Sample App
Less than to read
In order to help you get started quickly with your own application development, we are providing sample application which cover the basic Data Integration API calls to the X3 application.
In this section, you will build a simple application using Node.js which will upload a file to an Sage X3 configuration and download a file exported by and Sage X3 configuration.
Before you begin
Please make sure that you have latest versions of the following tech dependencies:
- Visual Studio Code
- Node.js
- npm (Installed by default with NodeJS)
- Git Client
- App ID/ App secret created with Sage App Registry
- Redirect URI: https://localhost:5050/callback
- Notification URI: https://localhost:5050/notifications
- Sage X3 Sand Box environment
Download an empty project here, then upzip the file. This command may take a few minutes:
npm i
Then create certificate file to enable https protocol:
openssl req -nodes -new -x509 -keyout server.key -out server.cert
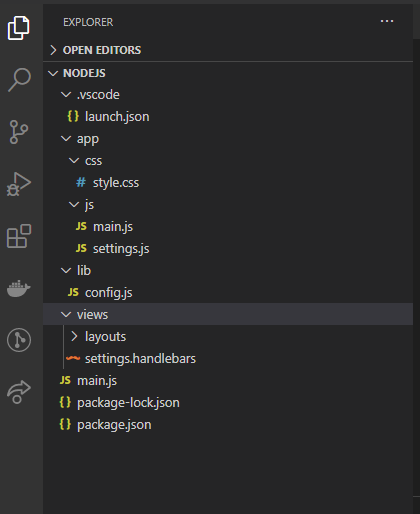
The result is a working empty project. Open the folder with VSCode, you should have this folder structure :

with folders:
-
css: contains CSS file for HTML stylesheet
-
js: contains javascript file for client side (Web browser)
-
lib: contains javascript file for server side
-
views: contains handlebars file for html template
-
main.js: entry point of the demo app
Before launching the project, goto .vscode folder and modify launch.json by entering these 3 values obtained before hand :
-
“ENDPOINT_URL”: API Gateway of the sandbox environment
-
“CLIENT_ID”: your App ID
-
“CLIENT_SECRET”: your App secret
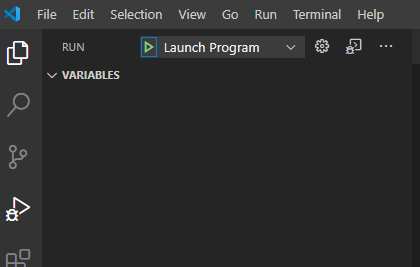
To start the project in VS Code, goto the debug menu then click “Launch Program”:

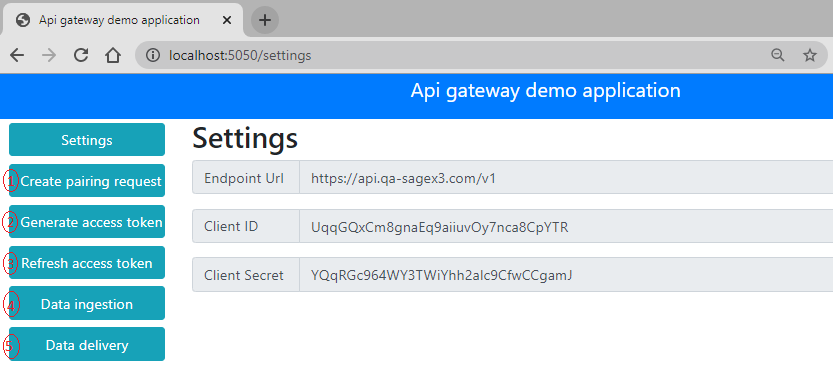
Open a web browser and go to https://localhost:5050/settings to see the default page:

Now, you will build the application step by step by implementing basically one by one menu entry (numbered on the screenshot). After each step, you can download the project source code:
- Step 1: Add pairing request
- Step 2: Add tokens generation from code
- Step 3: Add access token generation from refresh token
- Step 4: Add file uploading
- Step 5: Add file pooling and downloading
- Step 6: Dockerizing the demo app
Don’t forget to run npm install inside the unzipped folder then open the folder with VSCode and launch the debug to see the result at https://localhost:5050/settings.