How to deploy node and page extensions
Less than to read
To deploy custom nodes and pages, Sage X3 services needs to be installed and configured for your X3 solution. Follow the documentation on how to install Sage X3 Services.
Changing the add-ons directory in X3 Services
By default, add-ons (i.e. custom nodes and pages) are deployed in a directory called add-ons in the X3 Services root directory on the X3 Services host.
Add-ons are organized inside that directory by X3 Folder (Endpoint), and then by package name.
You can choose to change the location of the add-ons directory:
-
Access the xtrem-config.yml file in the X3 Services root directory.
-
Add or change the value in this part of the file:
addons: folder: <location> -
Restart the X3 Services service.
When you develop a custom package, you will deploy it in the add-ons directory inside the location you selected in the xtrem-config.yml file. You can do the deployment manually, or from release 2025.R1 onward, directly from the Deploy Add-ons menu in Sage X3.
Deploy your packages manually in your add-on folder
In the add-ons directory:
- Create a directory matching the name of the Sage X3 folder (endpoint) you are deploying your add-on for (for example,
SEED). - Create a sub-directory matching your package owner. Include the ‘@’ character in the name (for example,
@tinyplanet). - Create a sub-directory matching your package name. Use the full package name including the prefix (for example,
tinyplanet-xesg). - Copy the build directory and the package.json file from your package dev folder.
- Delete the previous node modules shortcuts from the add-ons directory.
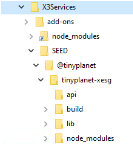
Below, you can see the example of the @tinyplanet package tinyplanet-xesg deployed in the SEED endpoint:
Deploy your packages from the Deploy Add-ons screen (from 2025 R1 onward)
From release 2025 R1 onward, you can also deploy a package from Sage’s Administration menu.
- On your development environment, zip the Build directory and
package.jsonfile from your package into a zip file. (Only the zip format is allowed.) The zip file should contain:
  package-name:
  -> build
  -> package.json
  -> other files/folders
- In Sage X3, select Administration > Utilities > API > Deploy Add-ons.
- Select New Addons deployment from the right-side Actions menu.
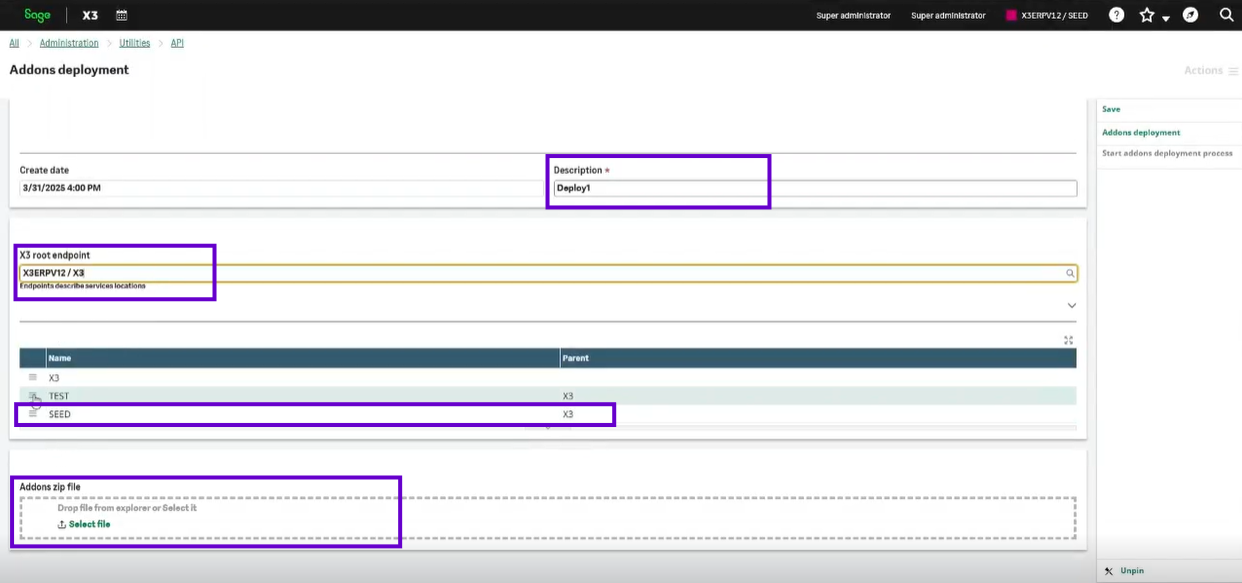
- In the Addons deployment screen, give a short description of your Add-on.
- Select the X3 root endpoint from the drop-down list of available endpoints.
- Check the list of folders and delete those folders you don’t wish to use for the add-on installation. Leave at least one.
- Under Addons zip file, select or drop the zip file from your newly built package to upload. Note that if another package by this name is already present, this process will overwrite it.
- Save the deployment record.
- Select Start addons deployment process from the Actions menu. It may take at least 30 seconds to complete.
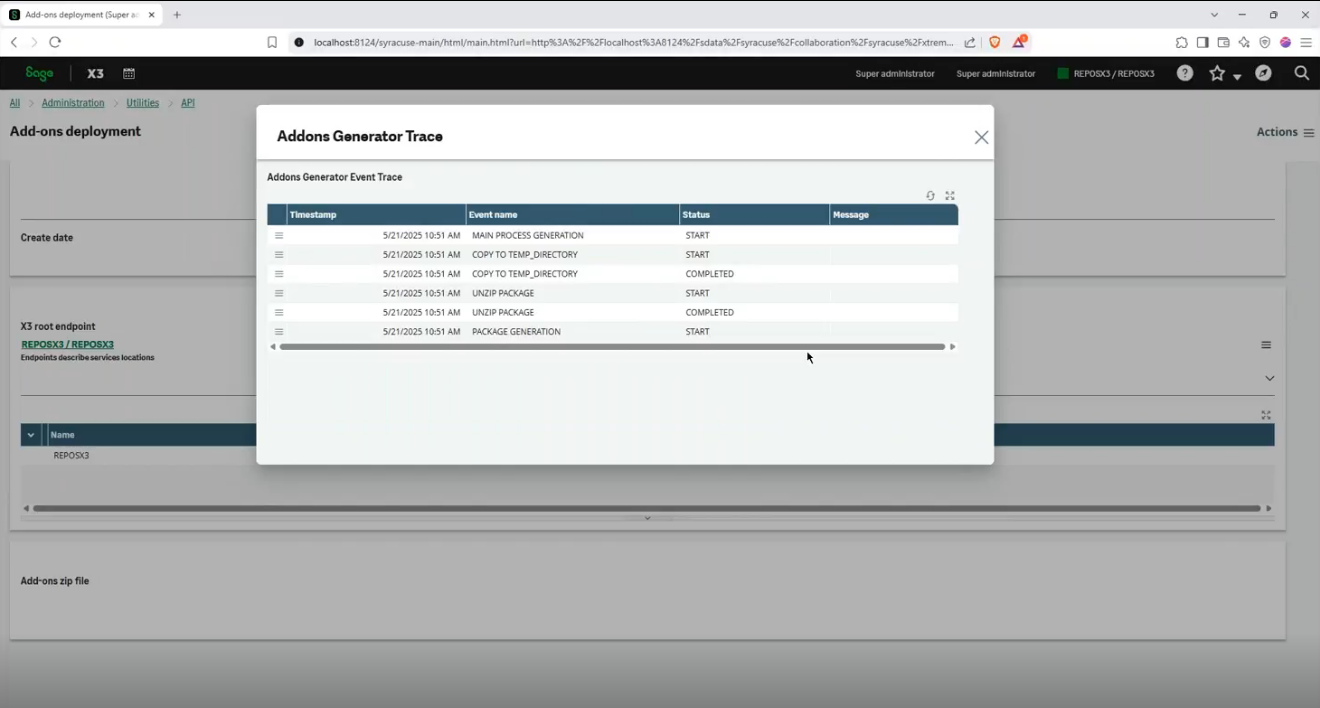
- From release 2025 R2/V12.0.38, you can trace the deployment process. Click Trace ID to visualize more information about the deployment process:
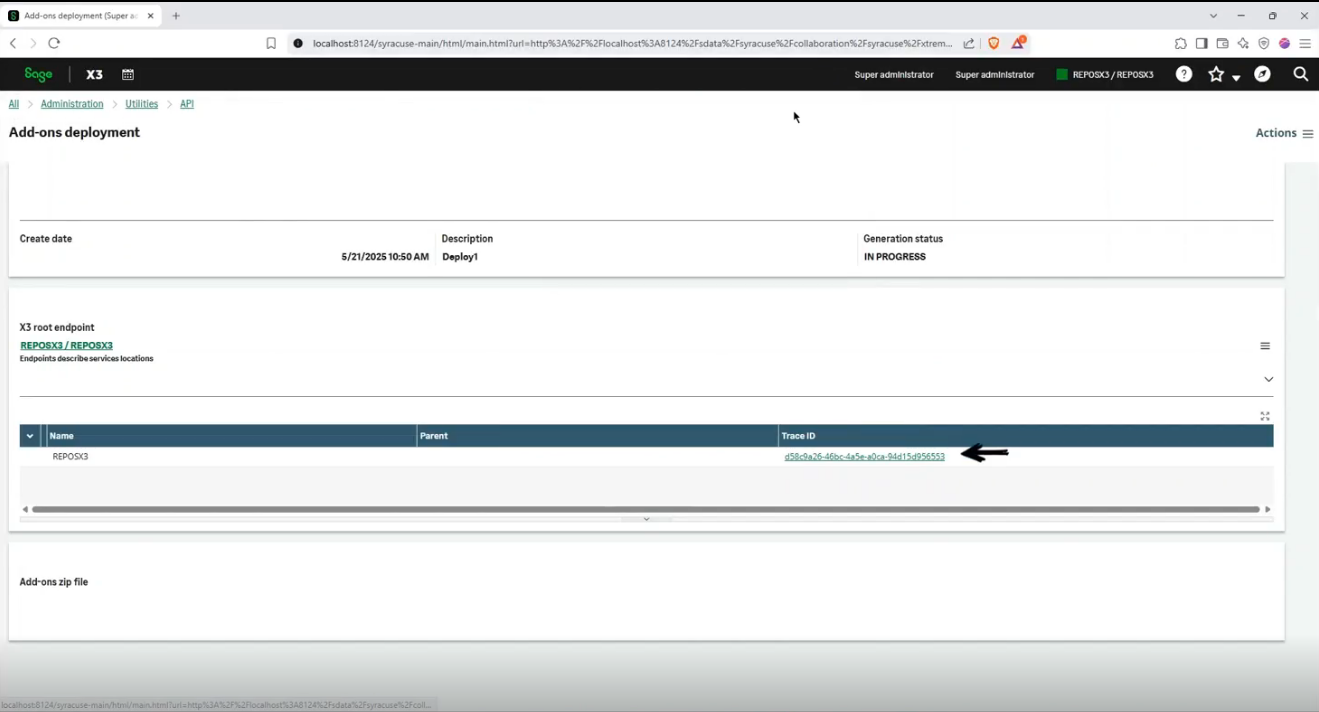
- X3 Services will be restarted in the background once the deployment is successfully completed.
Download an Add-on
You can also download an add-on zip file from an existing Sage X3 instance. use the Download Add-ons menu to get all the add-ons deployed in the current instance as a single zip file. You can then deploy those add-ons in other instances of Sage X3.
Check your new add-on
You can check your add-on from the sandbox or from Mobile Automation, depending on the nature of the add-on.
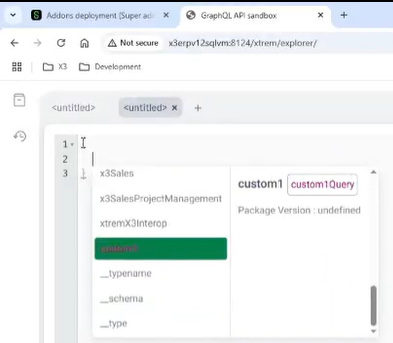
In the sandbox
When the restart is complete, your new add-ons should now be visible from the GraphQL API sandbox, and your new pages or page extensions should be usable.
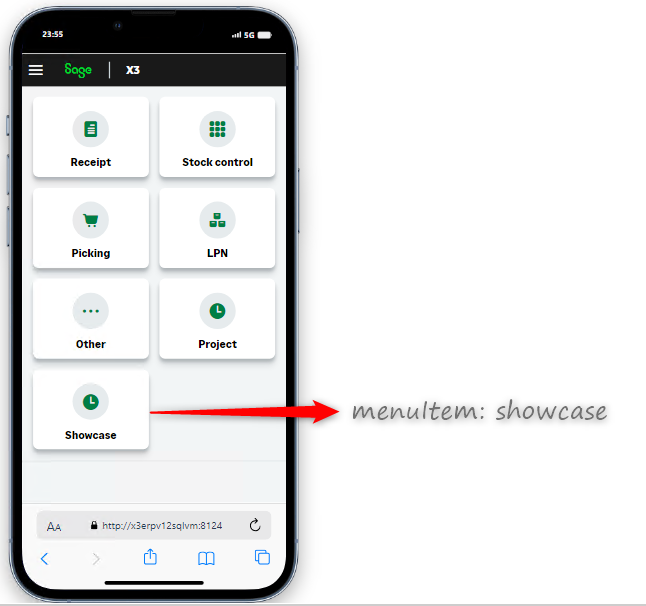
In Mobile Automation
If you need to update the add-ons folder, you have to stop and restart the Sage X3 Services in Windows Services to deploy the changes.
You are ready to test your applications on the Sage X3 Mobile Automation (/handheld).