Get started
Less than to read
Steps to get started with the Sage People API.
- Create a Sage People API user
- Obtain an Access token
- Postman Collection
- Using the Marker Parameter
- Inbound API Calls
Create a Sage People API user
Create a user with the correct permission sets, which grant an appropriate level of access to the key objects and fields.
Each API endpoint has its own permission set. The API Permission Set Mapping table below shows how the permission sets relate to the API endpoints
To check that your API user has the correct permissions, go to Setup > Administration Setup > Manage Users > Users and select your user from the list.
Scroll down to the Permission Set Assignments Related List and check that the user has the correct permissions assigned. The image below illustrates that the user only has access to the Absences API.

API Permission Set Mapping
| API Endpoint Name | Permission Set Name |
|---|---|
| /employees | Sage People Employees API |
| /employees/{employeeID}/payDetails | Sage People Pay Details API |
| /salaries | Sage People Salaries API |
| /bonuses | Sage People Bonuses API |
| /absences | Sage People Absences API |
| /absenceBalances | Sage People Absence Balances API |
| /timesheets | Sage People Timesheets API |
Object level Permissions
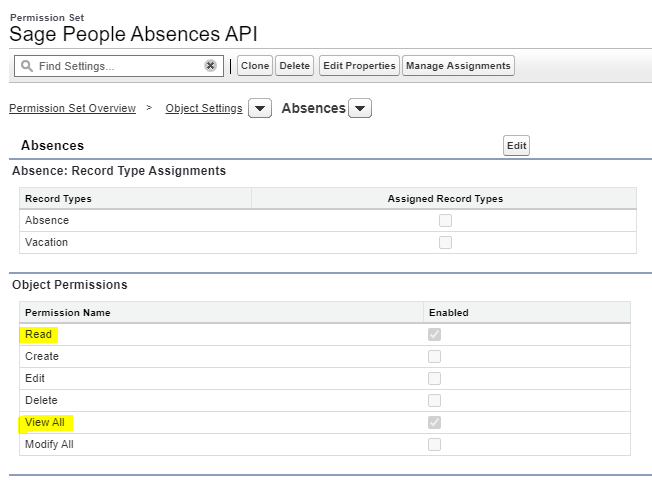
It is important to note the difference between the ‘read’ and ‘view all’ permissions in the Object Settings of a permission set. Having only ‘read’ permission means the user can view records they have created in the org, and the records which have been shared with them. The ‘view all’ permission ignores sharing rules and settings, and allows administrators to grant access to records across the organization.

Obtain an Access token
You need a bearer token for the API user in each call you make to the Sage People API. You can use any authentication flow supported by Salesforce, for more information refer to the Salesforce OAuth documentation.
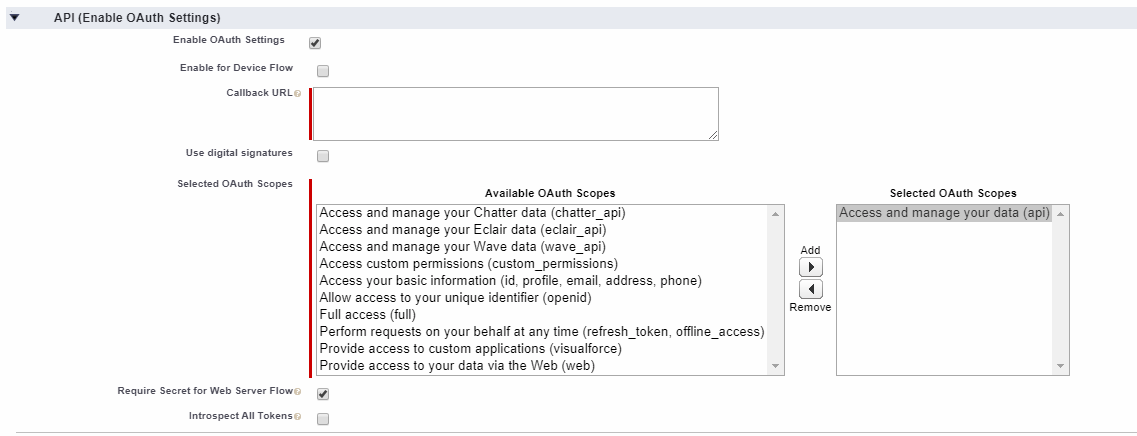
Salesforce OAuth is managed via a Connected App. The Connected App you create for the Sage People API will require the following OAuth scopes:
- Access and manage your data (api)

Postman Collection
You can use Postman to create your API calls. Download Postman
This Postman collection contains several sample API calls for the Sage People API. Refer to Postman documentation for more information on OAuth flows.
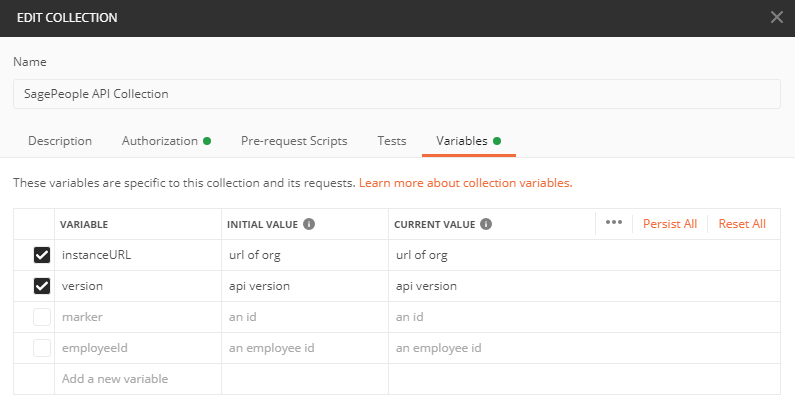
In order to use any of the requests within the Postman collection, you must set the following two variables:
- instanceUrl
- version

The other variables are only used for some requests.
Using the Marker Parameter
Marker is an optional parameter used to retrieve a page of data. It does this by taking the id of the corresponding object and returning a page of data starting from the object after the provided id.
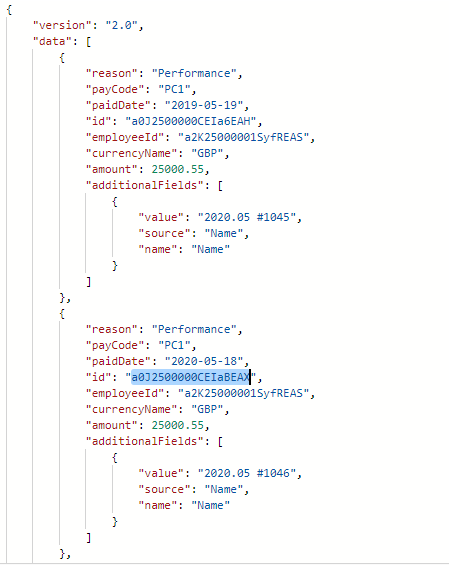
The following postman example shows how this works for the bonus endpoint, but is identical for the other API endpoints:
-
Request the first page of data using the /bonuses request

-
Copy the object id (bonus id) from the last object

-
Replace the {marker} in the example with the copied id:
{instanceURL}/services/apexrest/spapi/{version}/bonuses?marker={marker}
Due to technical limitations within Salesforce the marker can not be used for holding page states or consistent ordering.
When running a sync, we can only guarantee all the items present at the start of the sync will be included. Data created during a sync may or may not be included. This means that the ordering of the data is not consistent.
Inbound API Calls
The Sage People API currently supports inbound API calls using a POST call on the payDetails endpoint for a single employee. For more information on this API endpoint, see the Sage People API reference
To ensure your POST request is successful, you must:
- set the content-Type header as application/json
- pass a valid json body to the request as shown in the following payDetails example:
{
  "data": {
    "period": "7"
  }
}
You can also use custom fields or fields not already part of the standard request body by specifying an additionalFields block within your request body. Unlike our outbound (GET) API requests, inbound (POST) requests to Sage People API do not use an Additional Fields fieldset on the object. Instead, use an additionalFields block and add the field you wish to use using target and value.
The field specified in the additionalFields block must already exist on the object and you must have read access to the field.
The following example shows how to specify an additional fields block and add a custom field to the request:
{
  "data": {
    "period": "7",
    "additionalFields": [
      {
        "target": "aCustomTextField__c",
        "value": "myCustomFieldTextValue"
      }
    ]
  }
}
Currently, the inbound additionalFields mechanism supports fields of the following data types:
- Text.
- Checkbox. Use true or false as the value.
- Number
Support for other data types, such as dates, is being considered for future releases.