Add Pairing request
Less than to read
Before starting this step, please read the Authorization and Token Management topic, especially about the Pairing request. In this step, you implement the pairing process with Javascript language.
First, you create the handlebars template for the pairing request pairingRequest.handlebars in views folder:
  <h2>Create pairing request</h2>

  <div class="input-group mb-3">
      <div class="input-group-prepend w-12-c">
          <span class="input-group-text w-100">Config URL</span>
      </div>
      <input type="text" class="form-control" id="config_url" value="">
  </div>
  <div class="input-group mb-3">
      <div class="input-group-prepend w-12-c">
          <label class="input-group-text w-100" for="inputGroupSelect01">Scope</label>
      </div>
      <input class="custom-select" type="text" id="scope" list="datalist">
      <datalist id="datalist">
          <option value="api.dataIngestion api.dataDelivery">api.dataIngestion api.dataDelivery</option>
      </datalist>
  </div>

  <a href='' onclick="this.href='&scope=' + document.getElementById('scope').value + ' customer=' + document.getElementById('config_url').value" target="_blank">
      <button type="button" class="btn btn-secondary">Create pairing request</button>
  </a>
Then add pairing request url to main.js :
  const express = require('express');
  const exphbs = require("express-handlebars");
  const fileUpload = require("express-fileupload");
  const app = express();
  const bodyParser = require('body-parser');
  const fs = require('fs')
  const https = require('https')

  const config = require('./lib/config.js');

  const port = 5050;

  let envColor = process.env.COLOR;
  let bgColor;
  let buttonColor;
  switch (envColor) {
      case "red":
          bgColor = "danger";
          buttonColor = "warning";
          break;
      case "grey":
          bgColor = "dark";
          buttonColor = "secondary";
          break;
      default:
          bgColor = "primary";
          buttonColor = "info";
          break;
  }

  app.use('/', express.static('app'));
  app.use(bodyParser.json());       // to support JSON-encoded bodies
  app.use(fileUpload());


  app.get('/config', function (req, res) {
      config.get(req, res);
  });

  app.get('/settings', function (req, res) {
      res.render("settings", {bgColor: bgColor, btColor: buttonColor});
  });

  let redirectUrl = process.env.REDIRECT_URL ? process.env.REDIRECT_URL : process.env.ENV_URL + "/callback";
  let urlParams = process.env.ENDPOINT_URL + "/token/authorise?client_id=" + process.env.CLIENT_ID + "&state=astate&redirect_uri=" + redirectUrl;
  app.get('/pairingRequest', function (req, res) {
      res.render("pairingRequest", {bgColor: bgColor, btColor: buttonColor, url: urlParams, config_url: process.env.CONFIG_URL});
  });

  app.engine('handlebars', exphbs({defaultLayout: 'main', layoutsDir: 'views/layouts'}));
  app.set('view engine', 'handlebars');
  app.set('views', 'views');

  https.createServer({
    key: fs.readFileSync('server.key'),
    cert: fs.readFileSync('server.cert')
  }, app).listen(port, function () {
  });
-
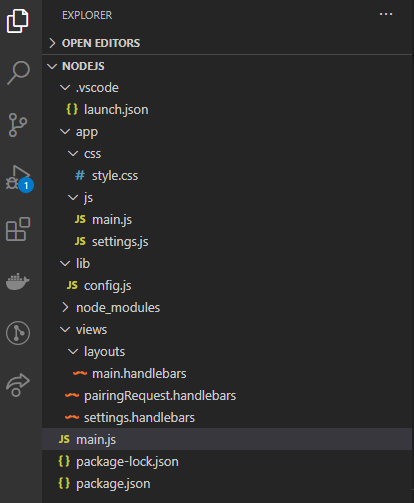
In the end of this step we have this file structure:
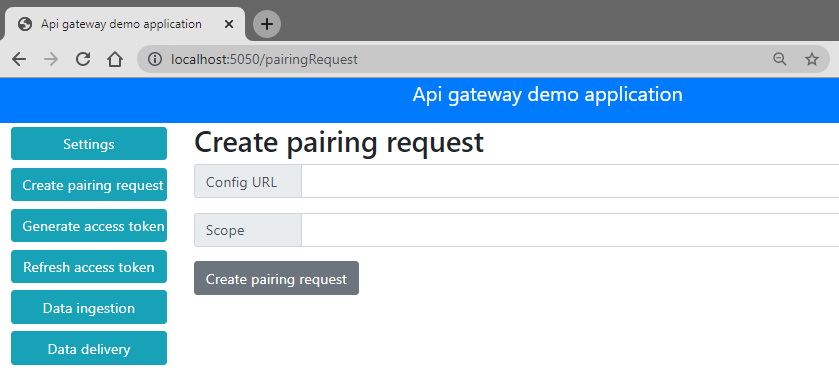
Then open the folder with VSCode and launch the debug to see the result at https://localhost:5050/pairingRequest.
You can also download the VSCode project at the end of this step here. Please note, after downloading the zip file, you have to run npm i to install all package dependencies before debugging with VSCode.