Test a standard query with your custom fields
Less than to read
Go to VS Code to generate your package(s) and add-ons
Go to VS Code and open your Development Studio directory.
Open the terminal of VS Code and go to the root directory of your Development Studio. Enter the following command:
npm run generate
This generates your application. If you create new data models, for example, your add-ons are included as new nodes. If you extend existing nodes, your add-ons are included as node extensions.
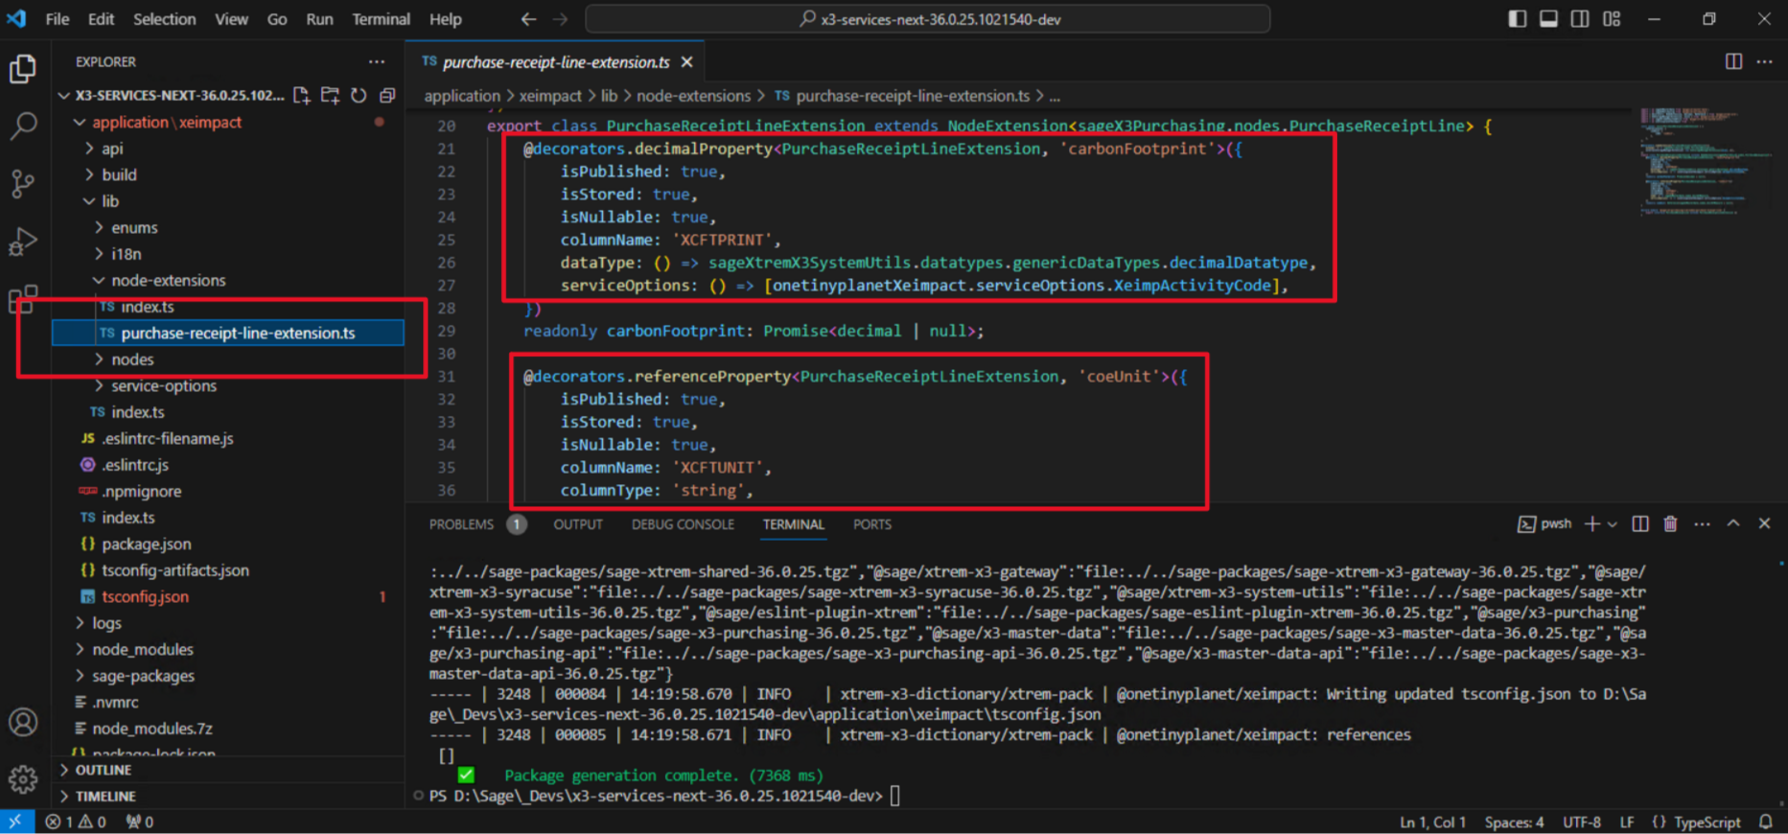
You will see a new directory in the Development Studio application directory with the name of your package. In this example, the path is application/xeimpact.
If you open the application/xeimpact directory, you see all the resources generated from the Sage X3 metadata. Those can include enums (local menus), new nodes, node extensions, service options (activity codes), and other resources.
In the case of this example, a node extension called purchase-receipt-line-extension was created and contains two new properties:

This is in the application/xeimpact package. If you look inside service options, you will see the new service option (activity code) XEIMP.
Run your application
All left to do now is to run your application and test it.
Go to your packages’s directory in /application (application/my-package). In the case of this example, it’s application/xeimpact. Make sure your terminal is in the directory and run the following commands:
npm run build and npm run start
You are now ready to test your API.
When you run the start script, your application will tell you Service is listening on port 8240.
This means you can now try your queries, and the service will respond on HTTP port 8240. 8240 is the default HTTP port setup for Sage X3 Services.
Test it
Your application has now started. Sage X3 Services is now listening on the HTTP port, which by default is 8240 on the standard Development Studio.
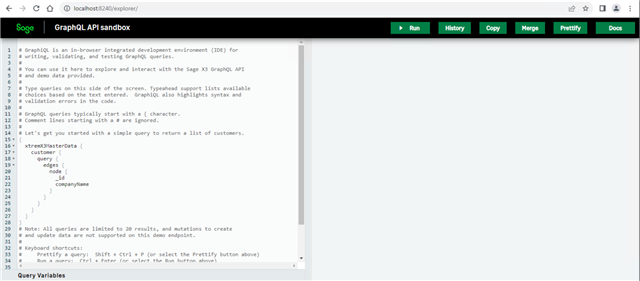
To test the GraphQL API using the standard explorer (GraphiQL), you can now use a navigator and access http://[YourServer]:8240/explorer/. You will be greeted by the standard explorer (GraphiQL) sandbox:

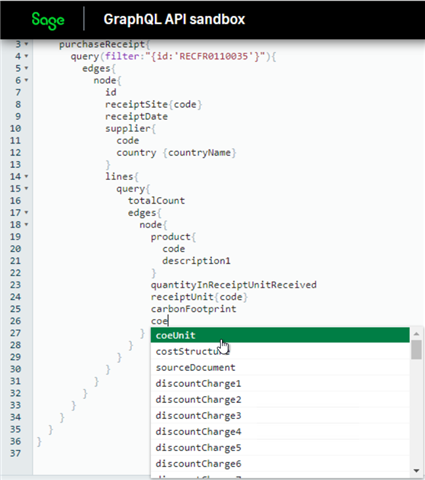
Let’s enter a query for Purchase Receipts. In the example below, a filter query is performed to get the Purchase receipts updated with carbon footprint values.
|
If you type carbonFootprint and coeUnit, or if you press Ctrl+spacebar, you will notice the explorer’s autocomplete feature will detect your new properties automatically:

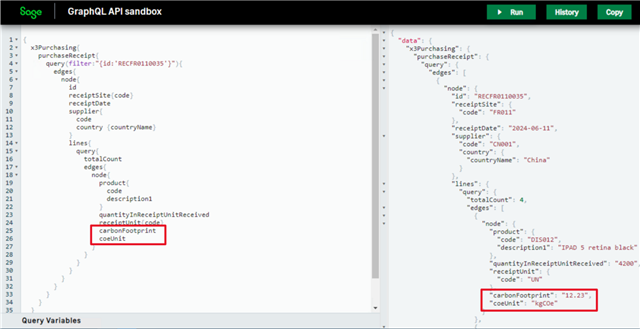
The standard Purchase receipt lines node has been extended with your custom fields:

Note: You did not have anything to do with your new local menu. It has been automatically transformed into an enum in GraphQL.
Once your custom API is tested, you can deploy it on your customer server: