API Access via Windows Authentication
Less than to read
This article will outline the setup of the Sage 200 API without the use of the Azure Active Directory Installation. This is to be used internally, as there is no Sage ID authentication and cannot be used externally.
As part of the Sage 200 product roadmap, we have introduced a new method of making API calls without having to set up the Azure Active Directory Tunnelling method. This method can be ran alongside the Azure Active Directory Tunnelling method, however this should only be used where API calls are made internally and no external calls are required such as via an external application or external website.
The setup requires the deployment of an IIS website and can be used in conjunction with Windows Authentication.
You can find all of the required components to download and test the API internally here.
APICustomAuth3
This is an example website which hosts a parallel endpoint for the API. The endpoint will work directly from the local LAN without going via the APIM service (Sage ID authentication). This uses reflection to load Sage assembles from the default Sage200NativeAPI folder. There are no references to any Sage dlls, which makes this version agnostic.
It shows how to create custom AuthorizeAttribute (e.g. to restrict access to only a service account) or to use the default Sage 200 attribute which would allow access to all registered users of Sage 200.
APIWebSiteAnon
This is a website which uses the identity of the user the app pool is running as to make API calls. This means all calls via this website will make API calls using the same Sage 200 User (the Sage 200 Services user).
APIWebSiteWindows
A website which uses the identity of the user logged on to the website to make API calls.
APIWindowsClient
A Windows Forms application which uses the Windows identity of the user running the application to make API calls.
Setting up the web service on an existing Sage 200 installation
The following instructions are written on the assumption that:
- You have 2 machines involved in this setup:
- A development machine (which will have Visual Studio installed)
- A target machine with Sage 200 installed and set up
- The target machine used to create these instructions was called DESKTOP-UGL1PMR. TIP: You will need to replace this name with your own machine name in all relevant places. This will be called out for you.
- The ports used to create these instructions were 87, 88, 89, 287, 288, 289. You can replace these ports with your own ports in all relevant places.
On your development machine
- You will need to have downloaded and unzipped the folder mentioned in the description above.
- Once you have done so, unzip the *APICustomAuth3 solution and open this in Visual Studio.
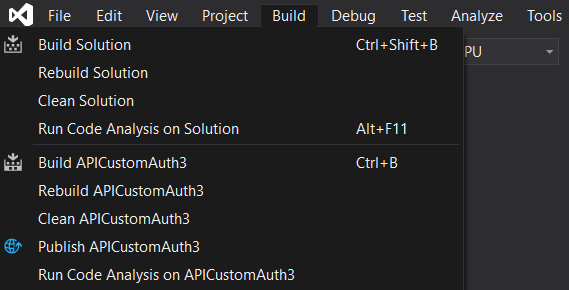
- When in Visual Studio, click on Build at the top in the menu bar, then Build Solution.
- To find the solution build, right click on the APICustomAuth3* website in Solution Explorer and click on **Open folder in File Explorer.
- You will need to move up one folder level and copy the APICustomAuth3 folder on the C:\ drive of the target machine.
On your target machine
-
Open the web.config file from the APICustomAuth3 folder, and ensure the following app settings match the Sage 200 Services web.config settings (usually found in C:\inetpub\Sage 200 App Services\Sage200Services):
- ServerRootPath
- credentialsFile
- ServiceBaseAddress
- Sage200Path (this should point the the Sage200NativeAPI/bin folder)
CAUTION: If you are using Sage 200 Professional Summer 2018 - Sage 200 Professional Summer 2019, you will need to follow these next steps. If you are using Sage 200 Professional Summer 2018 Remastered, or Sage 200 Professional 2020 R1 and above, please save your web.config file and continue with Adding the Website in IIS.
- You will now need to browse to C:\inetpub\Sage 200 App Services\Sage200NativeAPI\bin
- You will need to find the 2 following files: Newtonsoft.Json and System.Web.Http
- Right click on the file, then click on Properties and go to the Details tab. Make a note of the file version NOTE: It may look like this - 10.0.32451.2
- In the web.config file, find the assemblyIdentity for each of the files listed above.
- You will see there is a bindingRedirect property. This will look like this:
- You will need to replace the newVersion with the version of your corresponding file. For example, if your Newtonsoft.Json file version is 10.x.x.x, you will need to set the newVersion property to 10.0.0.0. Failure to do so will result in the website not running correctly.
- Repeat these steps for the System.Web.Https redirectBinding property.
- Save the web.config file once this is confirmed.
Adding the Website in IIS
- Open IIS Manager using inetmgr from the Run window
- You will now need to create a new website using these instructions:
-
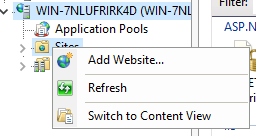
Right click on the Sites node and choose Add Website
-
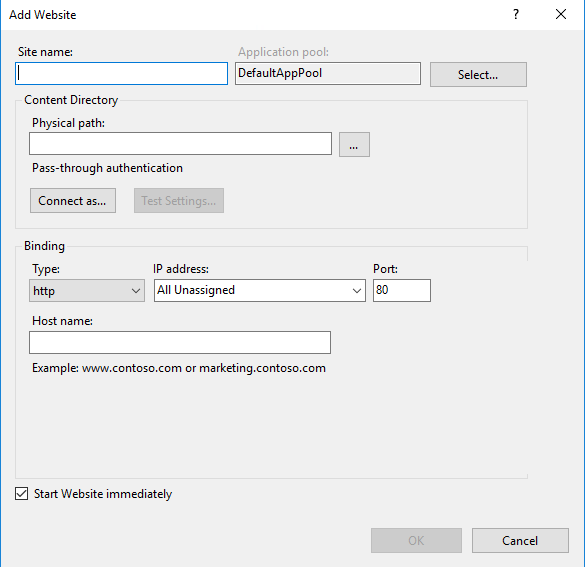
You will see the following screen:
-
- Your site name will be WindowsAuthAPI
- The physical path will be C:\inetpub (This is not really used and can be set to another folder if required)
- The port will be 87
-
Click OK
-
You will now need to enable Windows Authentication for the website:
-
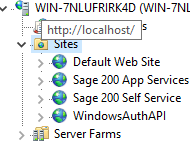
Select the new website from the tree view
-
Double click on Authentication in the main screen

-
Right click on Windows Authentication and select Enable

-
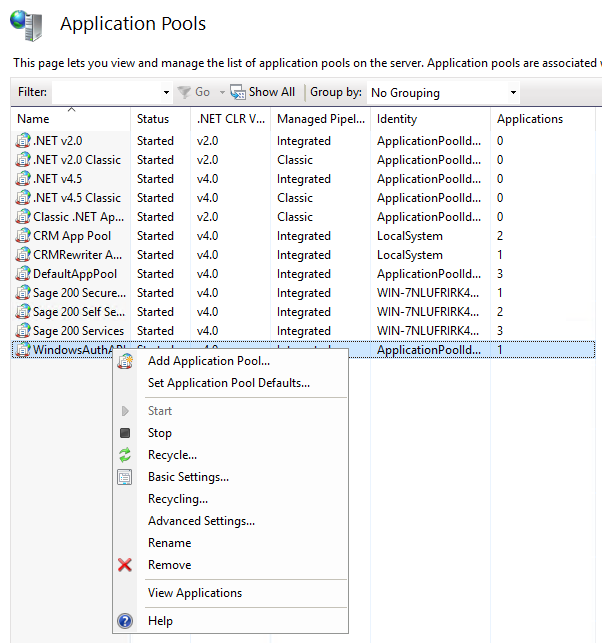
- You will now set up the Application Pool:
- Click on Application Pools in the tree view
-
Right on the WindowsAuthAPI application pool and choose Advanced Settings
- Make sure .NET CLR Version is 4.0
- The Managed Pipeline Mode needs to be Integrated
- Set the Identity to the Sage 200 Services user (this needs to be the fully qualified name e.g. servername\Sage200Services)
- Click OK
- You now need to create a self signed certificate and apply this to the website
- Click on the server name in the tree view
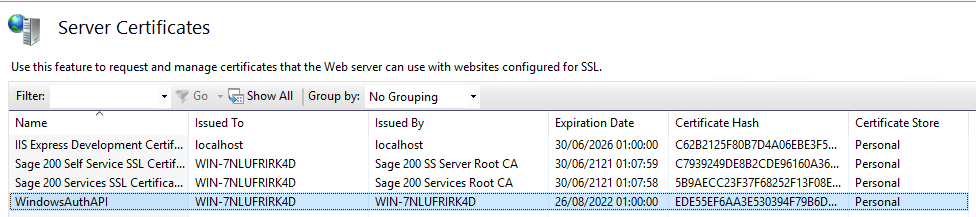
- Double click on Server Certificates in the main windows
- Right click on any whitespace and choose Create Self-Signed Certificate
- Enter a suitable name such as WindowsAuthAPI
- Click OK. You should now see the certificate in the list like this:
- To apply the certificate, right click on the website in the tree menu and choose Edit Bindings
- Click Add
- The type should be https
- Set the port to 287
- Set the SSL Certificate to the certificate you just created
- Click OK and close the Site Bindings window
- You now need to add the web application to the website:
- Right click on the website in the tree menu and choose Add Application
- Enter the Alias as WindowsAuthAPI
- Set the physical path as C:\APICustomAuth3
- Click OK
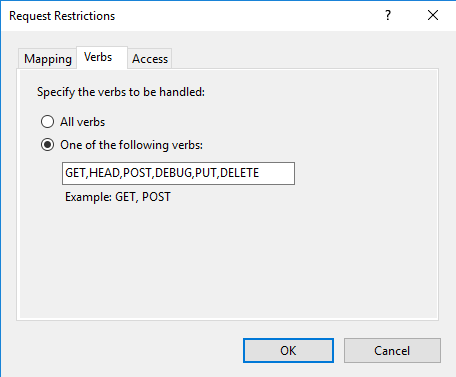
As PUT and DELETE are verbs that are not supported by default in your WindowsAuthAPI website, we will need to enable them by changing specific Handler Mappings. To do this you will need to:
- Highlight the website from the tree menu on the left hand side and double click on Handler Mappings under IIS.

- You will now see a list of the enabled handler mappings. Find ExtensionlessUrlHandler-Integrated-4.0 in the list and double click on it. This will open the following screen
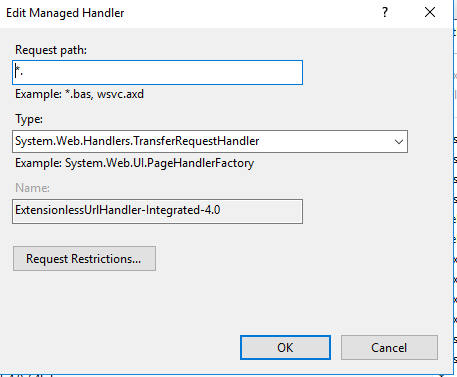
- Click on Request Restrictions and click on the Verbs tab. In here, enter PUT, DELETE and click OK, and OK again to take you back to the handler mappings.
- Repeat the above steps for ExtensionlessUrlHandler-ISAPI-4.0_32bit and ExtensionlessUrlHander-ISAPI-4.0_64bit. When amending these fields you will be greeted with the following prompt:
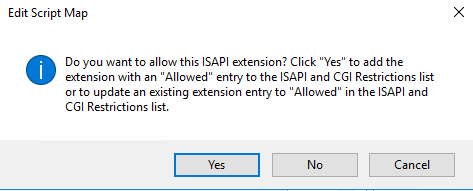
Click Yes to add the extensions
- When this is all done, perform an IIS Reset on your target machine.
You should now be able to test the API using a web browser to browse to https://yourservername:287/WindowsAuthAPI/internal/api_status. This will return a 1 in the browser body.
Once this has been successfully returned and the user you are logged in as has access to Sage 200 Companies, you will be able to browse to https://yourservername:287/WindowsAuthAPI/api/v1/sites and return a list of companies your user has access to.
NOTE: The in-browsr API requests will only allow you to return GET requests from the API. There is not a way to set the required authentication headers in a browser to enable you to run PUT/POST/DELETE requests as you would in Postman or a third party application.
Next Steps
To make use of the APIWindowsClient solution, follow the steps in this guide.
To make use of the APIWebsiteWindows solution, follow the steps in this guide.
To make use of the APIWebsiteAnon solution, follow the steps in this guide.