Auth URL prod
Authentication (Single Page App)
Quick Links
Accounts Accounting Entries Products Customers Sales quotes Sales invoices Suppliers Purchase invoicesIntroduction
Sage Active Public API V2 is secured by Oauth 2.0 with PKCE.
Single Page Applications (SPAs), which are web applications running entirely on the frontend, should implement PKCE instead of using a client secret, as they cannot securely maintain the confidentiality of a client secret.
Note on Implementation Libraries:
The purpose of this documentation is to provide a detailed understanding of the OAuth 2.0 authentication process for the Sage Active Public API V2, step by step.
It is essential for developers to grasp these fundamentals to ensure a secure and effective integration.
However, to streamline the integration process and reduce the complexity of directly handling HTTP requests, responses, and security procedures, developers are encouraged to utilize well-established OAuth client libraries.
These libraries are designed for various programming languages and frameworks, offering a more developer-friendly way to implement OAuth integration.
Using such libraries can significantly simplify the process, handling the intricate details behind the scenes.
They manage the creation of URLs, secure handling of state parameters, and the exchange of the authorization code for access tokens.
This approach not only reduces the amount of code developers need to write but also enhances the security and reliability of the application by adhering to established best practices.
OAuth 2.0 with PKCE is an extension to the OAuth 2.0 protocol and is designed for public clients that cannot securely store client secrets, such as mobile, desktop or single page applications.
It enhances security by using a temporary secret created for each authorization request, mitigating the risk of an authorization code interception attack.
Proxy
In a Single Page Application (SPA), a frontend application cannot directly call the Sage Active Public API due to the Cross-Origin Resource Sharing (CORS) policy.
This is because the domain of the application is different from that of the API, leading the browser to block access for security reasons.
To overcome this restriction, API calls must be made from the backend server, which will then authorize the frontend application to communicate with it.
One common solution to this problem is to use a proxy.
For more information and guidance on setting up a proxy, please refer to Sample quotes / 5. Proxy.
Access Token
For every request to Sage Active Public API V2, you must provide a valid Access Token in the authorization header.
Authorization: Bearer {Access Token}
Scopes
Your application will also need to authorize the necessary rights for it to function (scopes).
Warning! Only grant the necessary permissions.
For example, if your application does not plan to write data to Sage Active, it is not necessary to give the Write Sage Active Data permission.
Obtaining and Refreshing Access Tokens
The steps below detail the process for acquiring an access token for a Single Page App, as well as utilizing a refresh token to secure a new token upon the expiration of the existing one.
Creating a Code Verifier and a Code Challenge
Before the authorization request, your Single Page App must create a code verifier and a code challenge.
- Code Verifier: A cryptographically random string generated by your Single Page App.
- Code Challenge: The code verifier transformed using the method you choose, typically S256.
// Example of creating a code verifier and a code challenge
function base64URLEncode(str) {
    return str.toString('base64')
        .replace(/\+/g, '-')
        .replace(/\//g, '_')
        .replace(/=/g, '');
}
var verifier = base64URLEncode(crypto.randomBytes(32));

function sha256(buffer) {
    return crypto.createHash('sha256').update(buffer).digest();
}
var challenge = base64URLEncode(sha256(verifier));
Important Note on Base64 Encoding in Code Challenge Creation
It’s crucial to remember to encode the SHA256 encrypted value in base64 to ensure it’s correctly formatted for transmission.
The base64 URL encoding of the SHA256 encrypted value ensures it is compatible with URL standards, preventing issues related to character encoding and transmission.
1. Authorization Request
You must contact the authorization server of Sage Active by calling the authentication URL with the GET method and the required parameters, including the code_challenge and code_challenge_method:
| Settings | Value |
|---|---|
| response_type | This parameter must always contain code |
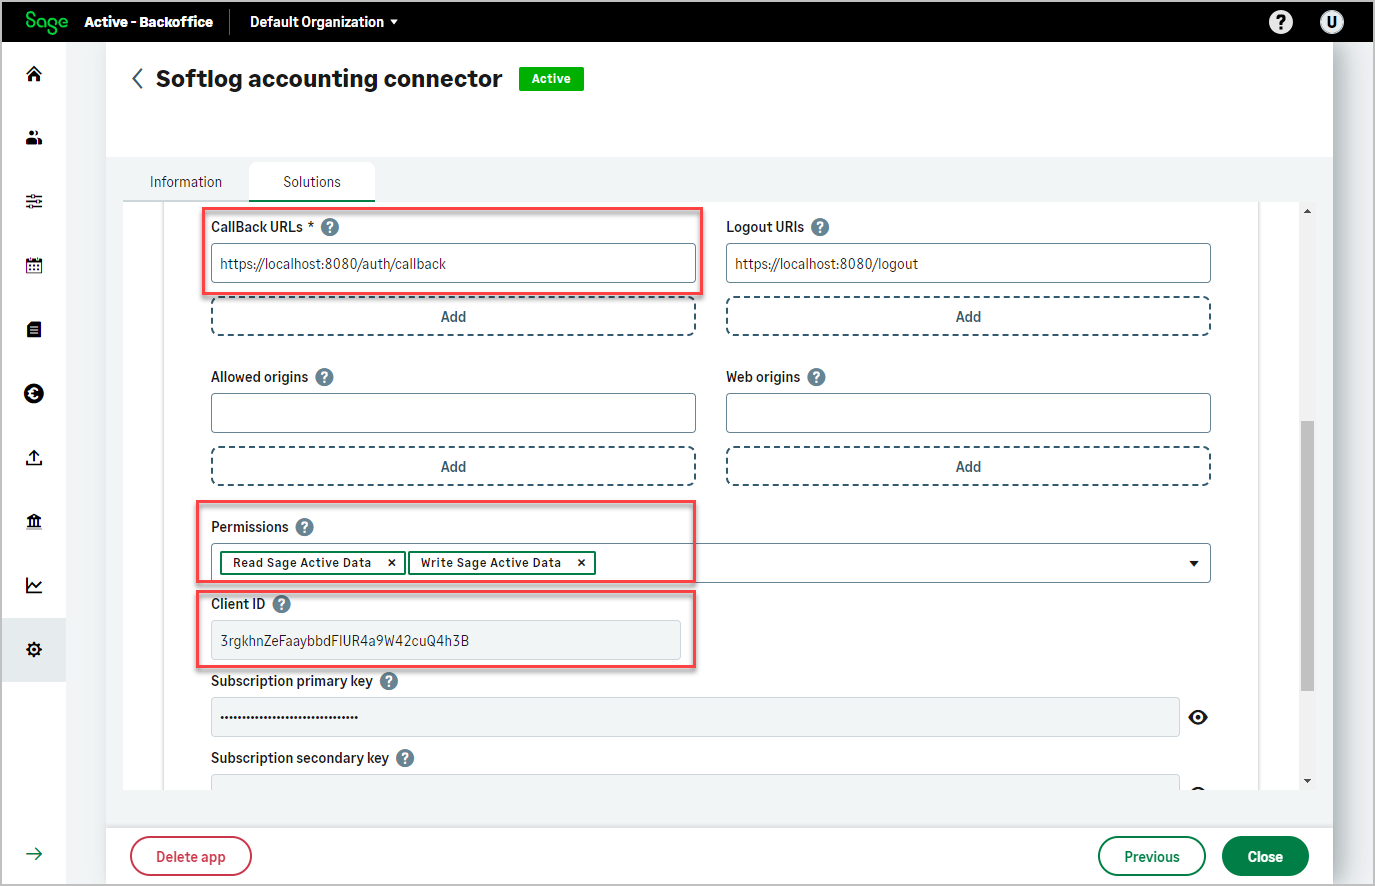
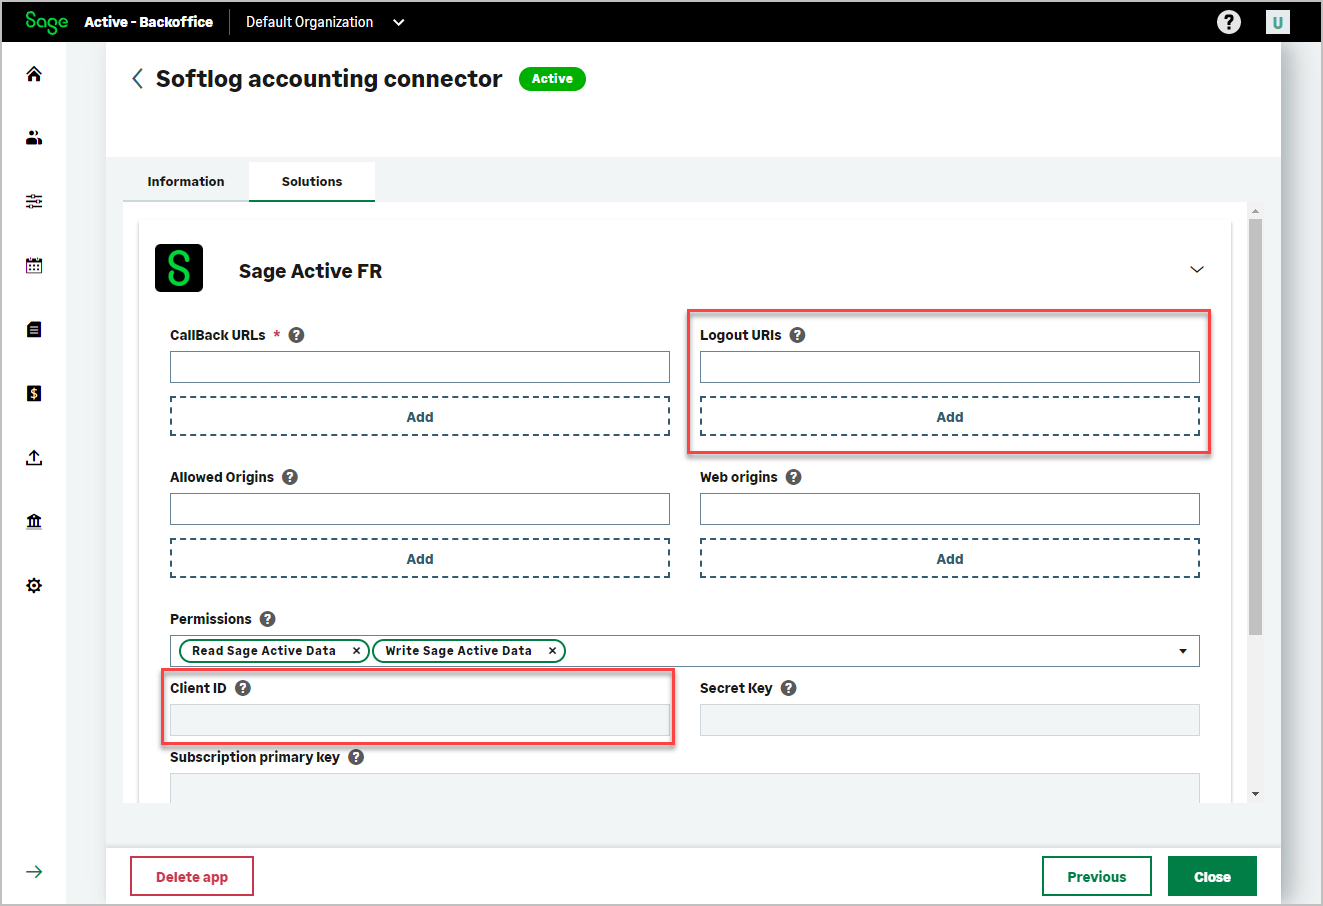
| client_id | The Client ID generated when creating your app |
| scope | The required permissions for your application separated by a space %20:
|
| redirect_uri | The redirect url (Callback URL) you mentioned in your app |
| code_challenge | The code challenge generated from the code verifier |
| code_challenge_method | The transformation method used on the code verifier to create the code challenge, typically S256 |
| login_hint | Optional email address used to pre-fill the Sage ID login flow. |
Behavior of login_hint
- If login_hint is provided and the email belongs to a Sage ID account, the user is directly prompted to enter their password.
- If login_hint is provided and the email does not belong to a Sage ID account, the account creation interface is displayed.
- If login_hint is not provided, the standard Sage ID login flow is displayed and the user must first enter their email address.
If the call is successful, an HTTP response code 302 Found is returned and, in the provided authorization redirect URL, the following query parameters are returned:
code: This is the authorization code which the client will exchange for an access token.scope: This indicates the permissions granted by the user. The scopes here areRDSA WDSA offline_access, which might stand for different access levels or permissions within the application and the ability to obtain refresh tokens (indicated byoffline_access).iss: This denotes the issuer of the response, can be used to validate the authenticity of the authorization responsestate: Typically included inauthorization requests and responses to maintain state between the client and the authorization server.
This mechanism is used for CSRF (Cross-Site Request Forgery) protection and to restore the previous state of the client application after the authorization flow completes.
Sample of the redirection to your redirect url with the query parameters
`http://your-redirect-uri.com/callback?code=AQzASDZZqxxxx...&scope=RDSA WDSA offline_access&iss=https://{sbcAuthUrl}&state=1234`
Possible errors
access_denied: Sage Active refuses to authorize your application.invalid_request: A required parameter is missing, invalid or provided multiple times.invalid_scope: The rights mentioned inscopeare incorrect or insufficient.server_error: The authorization server encounters an unexpected error that prevents it from responding to the request.temporarily_unavailable: The authorization server is not available. We recommend waiting 10 minutes before trying again.unauthorized_client: The client is not authorized to perform this action. This may be due to an incorrect client_id value.unsupported_response_type: The authorization server does not support the method used to request the code. You need to make sure the response type in your request iscode.
2. Resend authorization code to get access token
If the previous call is successful, you then need to make a POST call to get the Token:
Access Token URL prod
| body parameters | Value |
|---|---|
| grant_type | This parameter must contain authorization_code |
| code | The code returned by the GET call described earlier. |
| redirect_uri | The redirect url (Callback URL) you mentioned in your app |
| client_id | The Client ID that was generated when creating your app |
| code_verifier | The code verifier generated earlier |
If permission is granted, the response will return:
access_token: the access token value used for authentication of your requests to Sage Active Public API V2expire_in: the duration in seconds during which the access token is granted,token_type: always containsBearer,scope: the rights that have actually been authorized,refresh_token: The refresh token value, provided only ifoffline_accessscope has been requested and granted, which is used to obtain new access tokens when the current access token expires.
Sample of response
{
  access_token: "eyJhbGciOiJSUzI1NiIsImtpZCI6IjEyNTA2QjNGOTFFRxxxxxxxxxxxxx"
  expires_in: 28800
  refresh_token: "DF6FD016916A1263xxxxxxxxx"
  scope: "RDSA WDSA offline_access"
  token_type: "Bearer"
}
Remarks
- Make sure you don’t share this Access Token and don’t store it in an unsafe location.
- Reserve up to 2048 bytes in your data storage for this Access Token
- Also reserve up to 2048 bytes in your data storage for the Refresh Token.
- You should not share this refresh token or store it in an insecure location such as an unencrypted browser session.
Possible errors
invalid_request: A required parameter is missing, invalid or provided multiple times.invalid_grant: thegrant_typeparameter mentioned is invalid or unknown, or the authorization code could be expired (after 60 seconds), already used or unknown, or the refresh token has expired or has been revoked.invalid_client: The client cannot be authenticated. This may be due to an incorrectclient_idvalue.unauthorized_client: The client is not authorized to use the specifiedgrant_type.unsupported_grant_type: The authorization server does not support the specifiedgrant_type. You need to make sure thegrant_typein your request isauthorization_codeorrefresh_token.
3. Use a Refresh Token to Get a New Access Token
You can renew an access token using a previously issued refresh token, for example when the current token has expired. This allows your application to obtain a new access token without requiring the user to log in again.
Access Token URL prod
| Settings | Value |
|---|---|
| grant_type | Must contain refresh_token |
| refresh_token | The refresh_token returned in the previous token response |
| client_id | The Client ID assigned to your application |
If permission is granted, the response will return:
access_token: the new access tokenrefresh_token: a new refresh token (if token rotation is enabled)
Note about offline access
To be able to renew an access token using a refresh token, your application must request the offline_access scope during the initial authorization request.
This is done only when calling the /connect/authorize endpoint, as part of the initial login and consent flow.
If offline_access is not present in the original authorization request, no refresh_token will be issued, and token renewal will not be possible.
| Settings | Value |
|---|---|
| scope | A list of requested permissions separated by a space (%20):
|
Important
- Do not include the
scopeparameter when usinggrant_type=refresh_token. The authorization server will automatically reuse the original scope. - Do not forget that to renew the access token, you must exploit the refresh_token by sending a request with the grant_type
refresh_token. - Learn more:
Revoke a Refresh Token
You can revoke a refresh token so that it is no longer valid for obtaining new access tokens.
Please note that you cannot revoke access tokens, they are valid for their lifetime.
Once a refresh token is revoked, it can no longer be used to obtain a new access token, so when the current access token expires, the user will need to log in again to access the application.
Revoke Token URL prod
| Settings | Value |
|---|---|
| token | The value of the refresh_token you wish to revoke |
| client_id | The Client ID that was generated when creating your app |
If the operation was successful you will get a response with HTTP status 200.
Session Termination (Logout)
The process described here allows you to effectively log out a user by invalidating the refresh token, ensuring it can no longer be used to generate new access tokens.
When the refresh token is invalidated, any existing access tokens will remain valid until their set expiration but cannot be renewed. Consequently, the user will be prompted to re-authenticate once the access token expires.
Hereʼs how to perform the logout process:
Logout URL production
To complete the logout, follow these query parameters:
| Settings | Value |
|---|---|
| client_id | The Client ID obtained during your application registration. |
| returnTo | The logout URL listed in your application’s Logout URIs field within the associated solution. |
Additionally, ensure to clear any stored access and refresh tokens from the client’s local storage to maintain security and prevent unauthorized use of stale tokens.