Using Postman
Less than to read
To see the Transaction Import Connector API in action you can use Postman, a multi-platform REST client with intuitive GUI for configuring HTTP requests, designing JSON payloads, and viewing HTTP responses.
A Postman collection is available to illustrate the Transaction Import Connector API methods and workflow.
Setting up Postman
Step 1: Get Postman
Visit the Postman website to Download and install Postman.
Step 2: Get the Postman collections
Postman supports collections which are a pre-packaged bundle of API requests. To assist in the development and testing of your integration, we have provided three separate Postman collections.
TBC - Add links to zip files for Postman collections here
Step 3: Import the Postman Collection
- Unzip the JSON format files from the downloaded ZIP archive.
- Open Postman
- From the main menu, select File > Import
- Drag and drop the JSON files into Postman
Step 4: Import the environment JSON received during registration
The environment JSON provided by Sage during registration, contains the details of the sandbox test environment including your client ID and secret. The environment JSON must also be imported into Postman to enable the collections to function.
- Unzip the JSON format file from the downloaded ZIP archive.
- Open Postman
- Select the manage environmnets option at the top right of the Postman UI
- From the manage environmnets view, select Import
- Select the choose files option and locate the environment JSON file
- Ensure the new environment is selected once imported
Using the Postman Collection
Setup an organisation, company and bank account
The first element which is required for the transaction import is to have a valid organisation, company and bank account. In order to set this up the following calls need to be executed in this order:
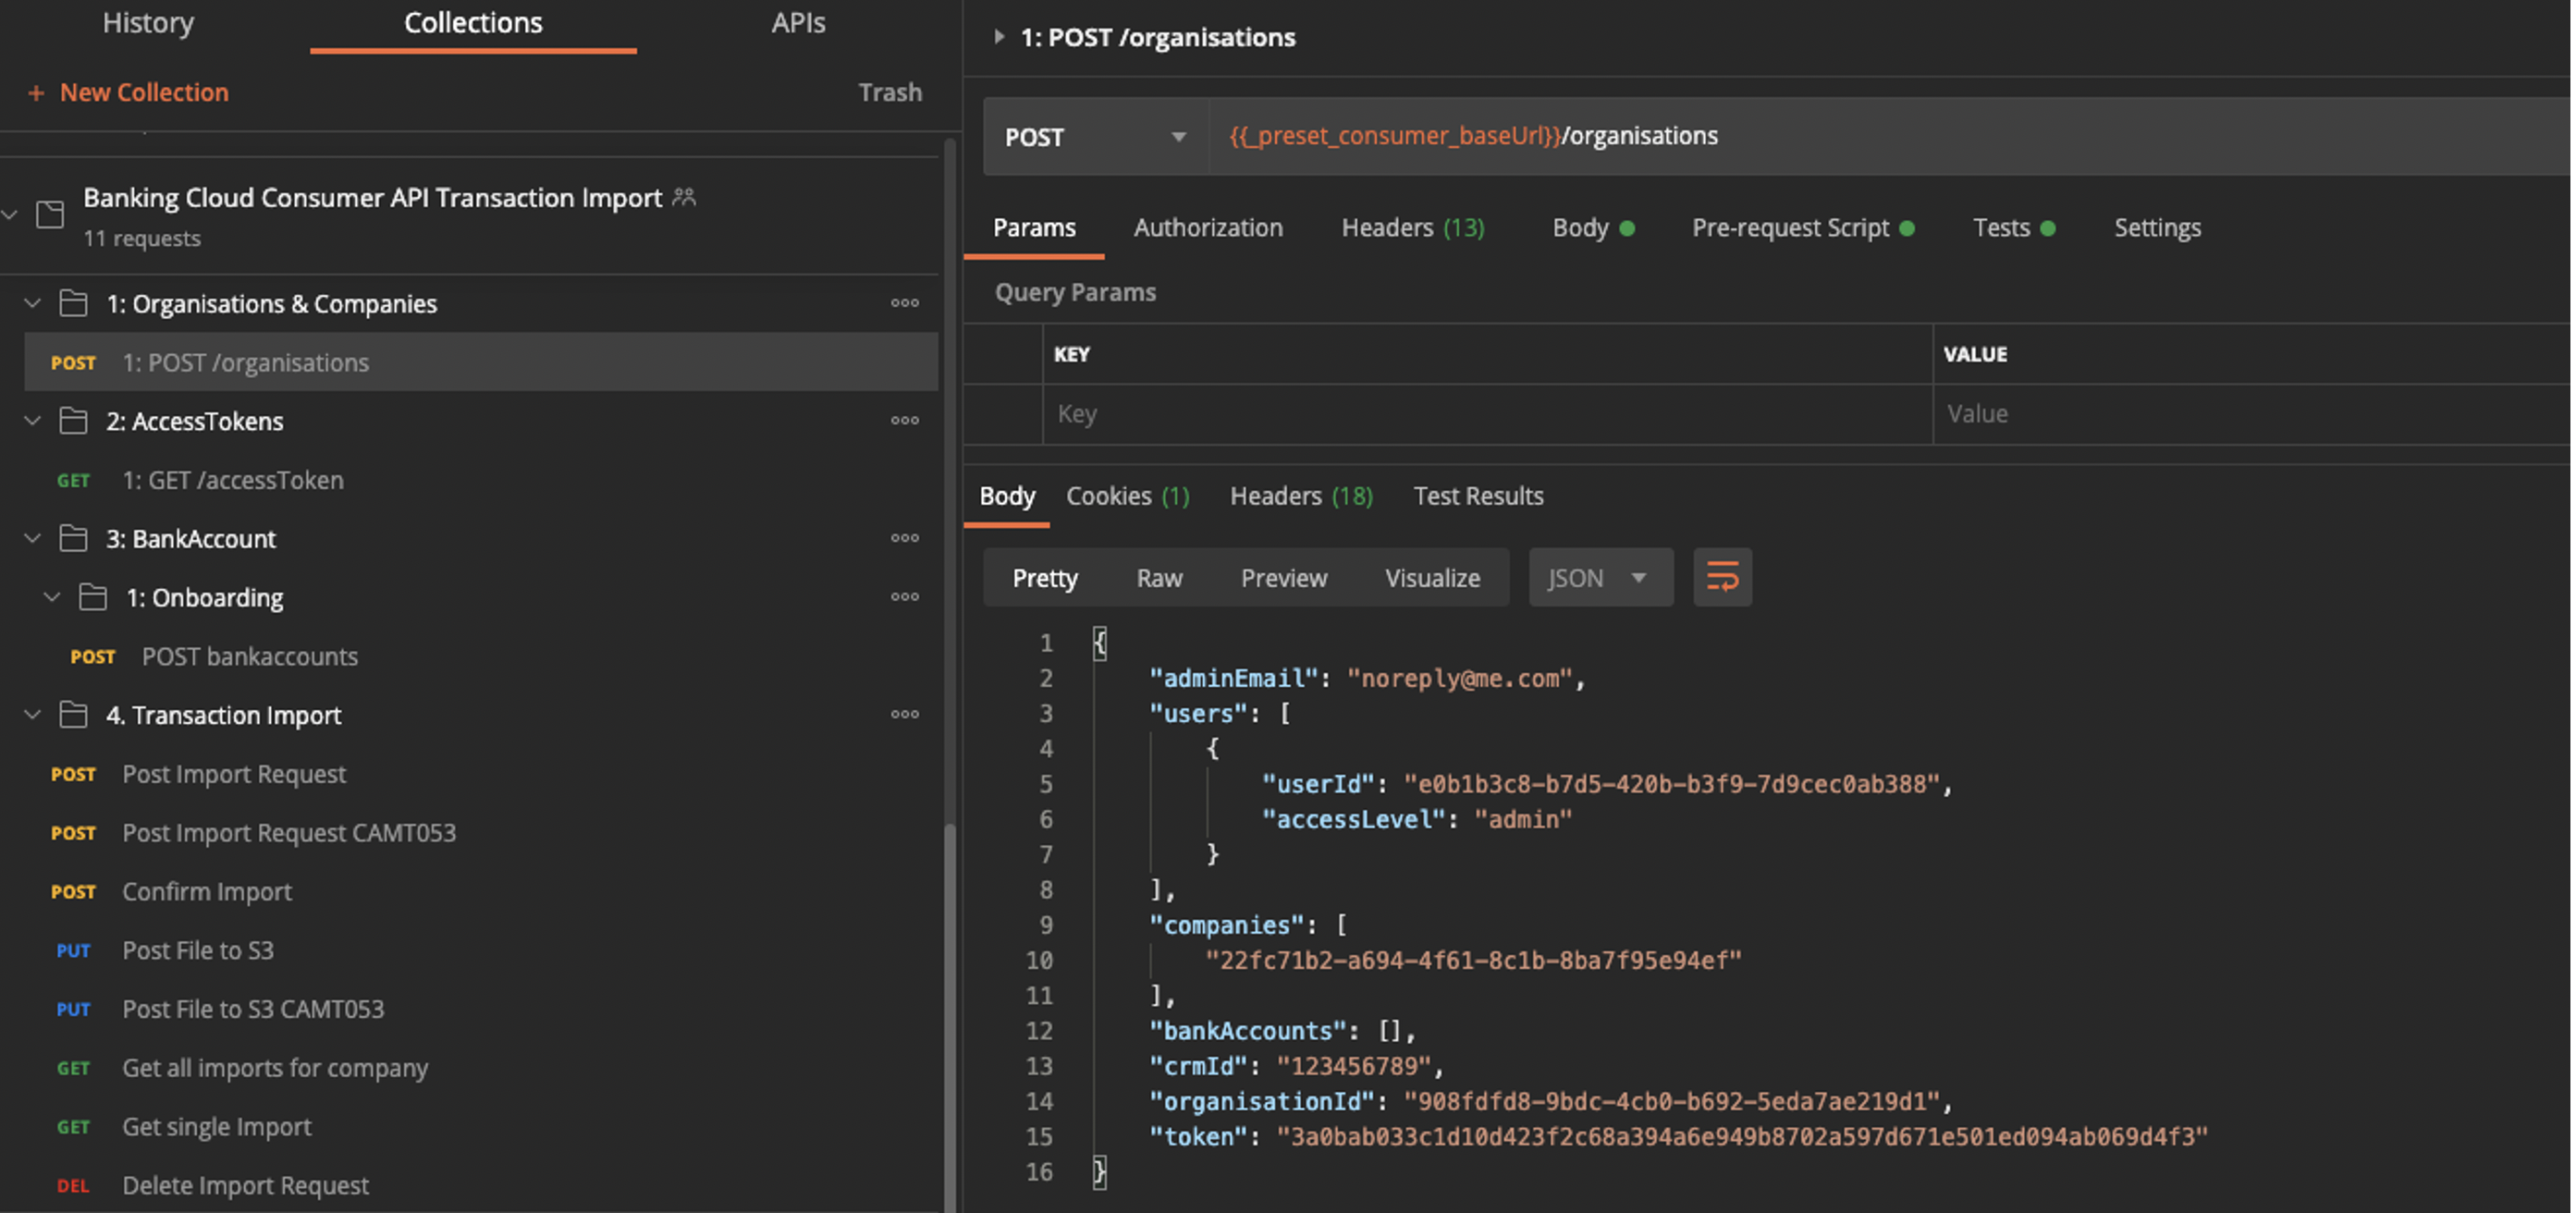
This first call will setup the organisation and company in banking Service, the next call to run is GET /accessToken:
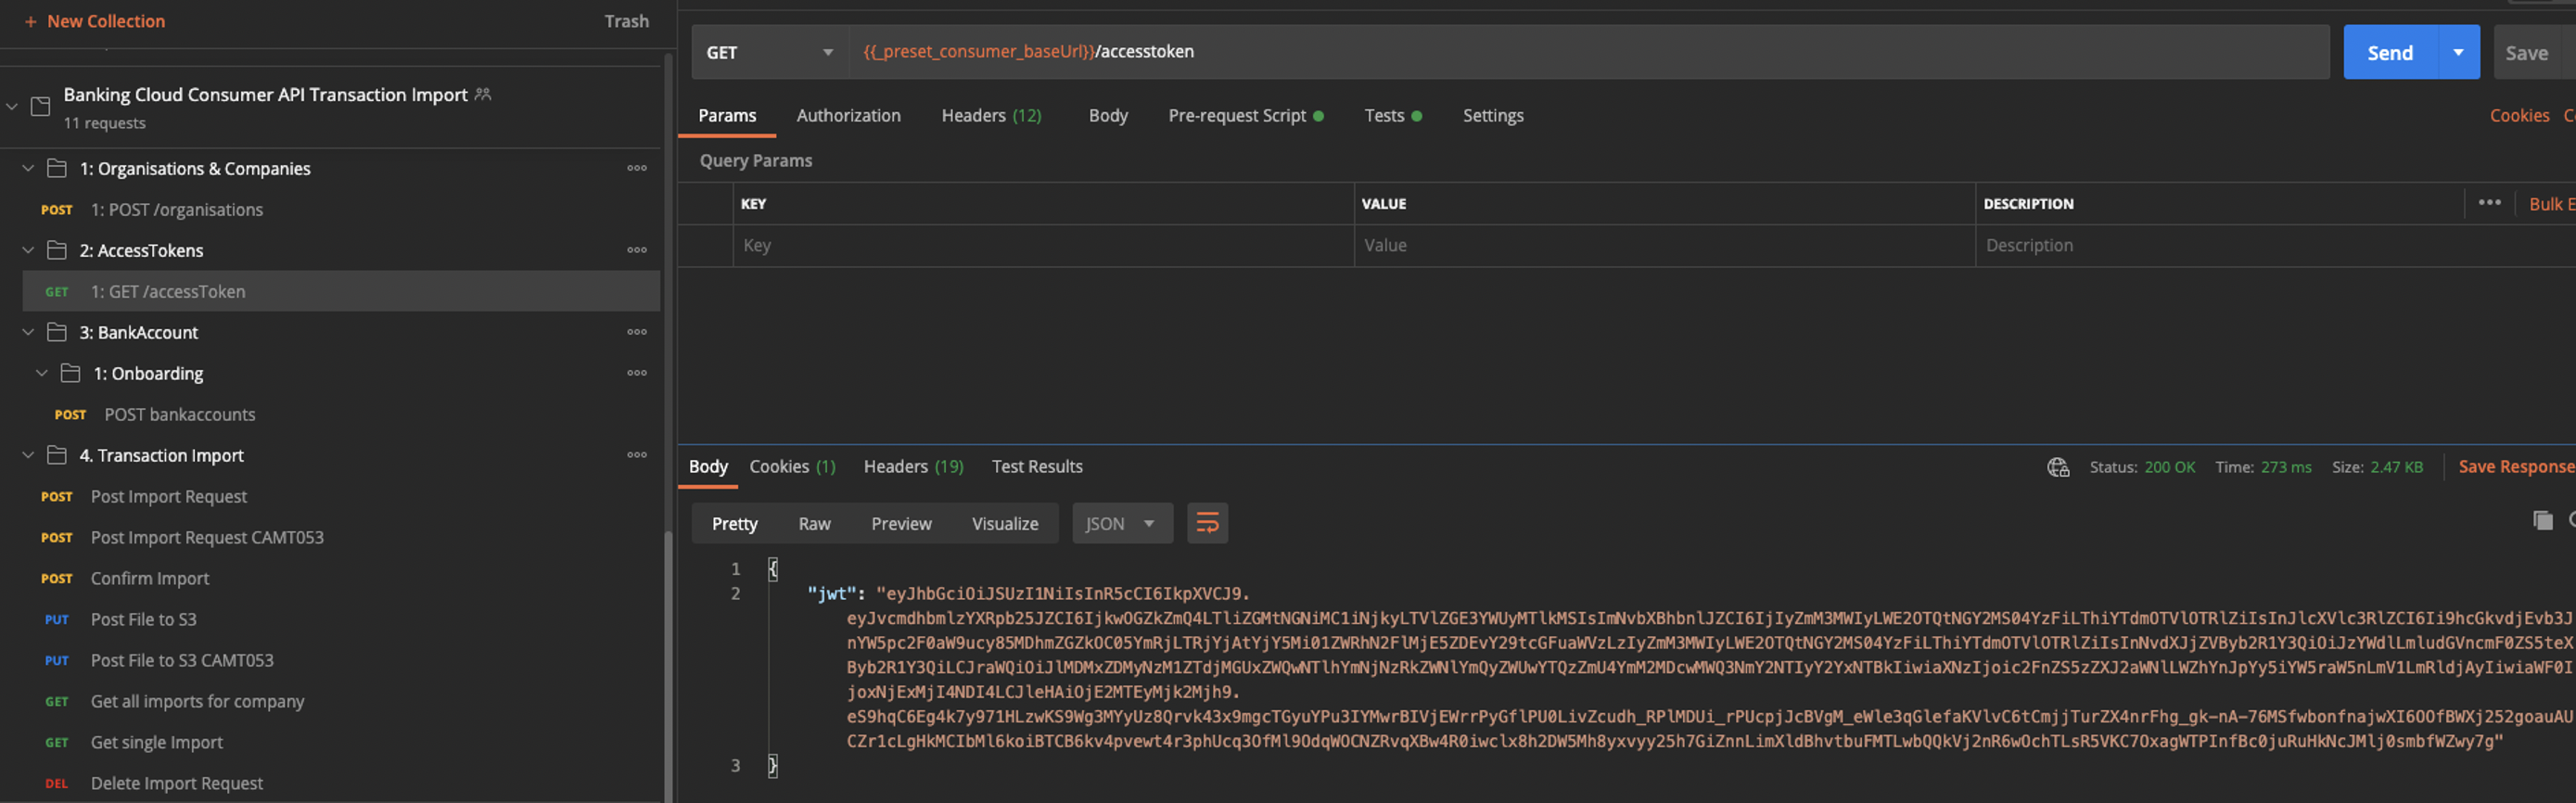
A JWT is returned when using this call and will now allow you to successfully run the POST bankAccounts:
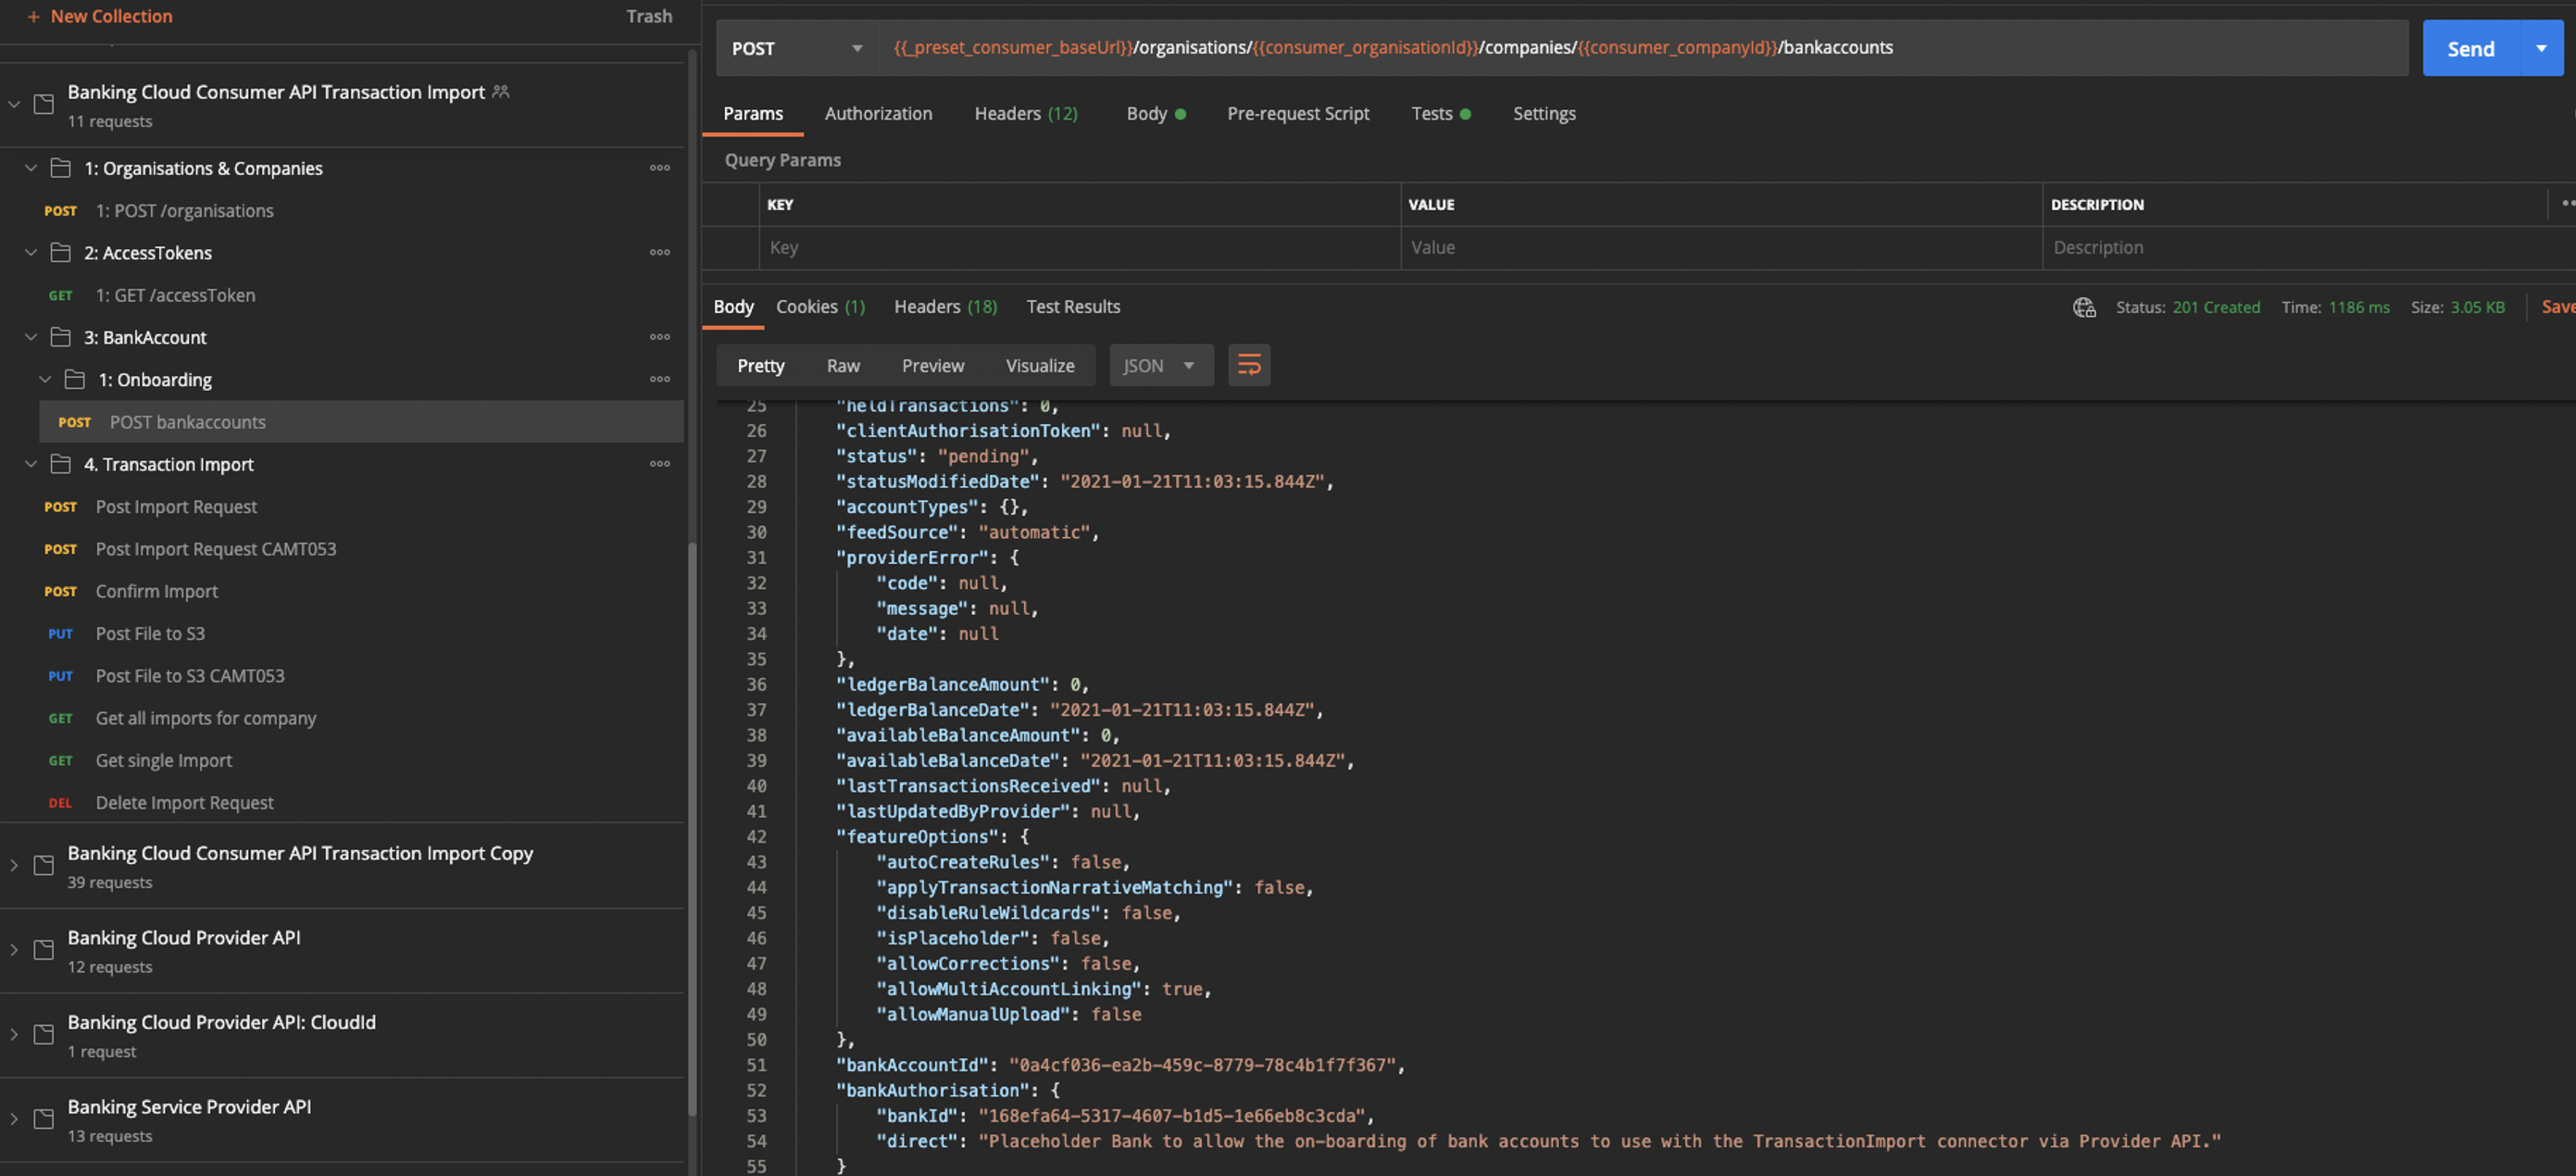
The above image shows the new bank account which has been created for this run, the first step of the setup is now complete.
Setting up the transactions file
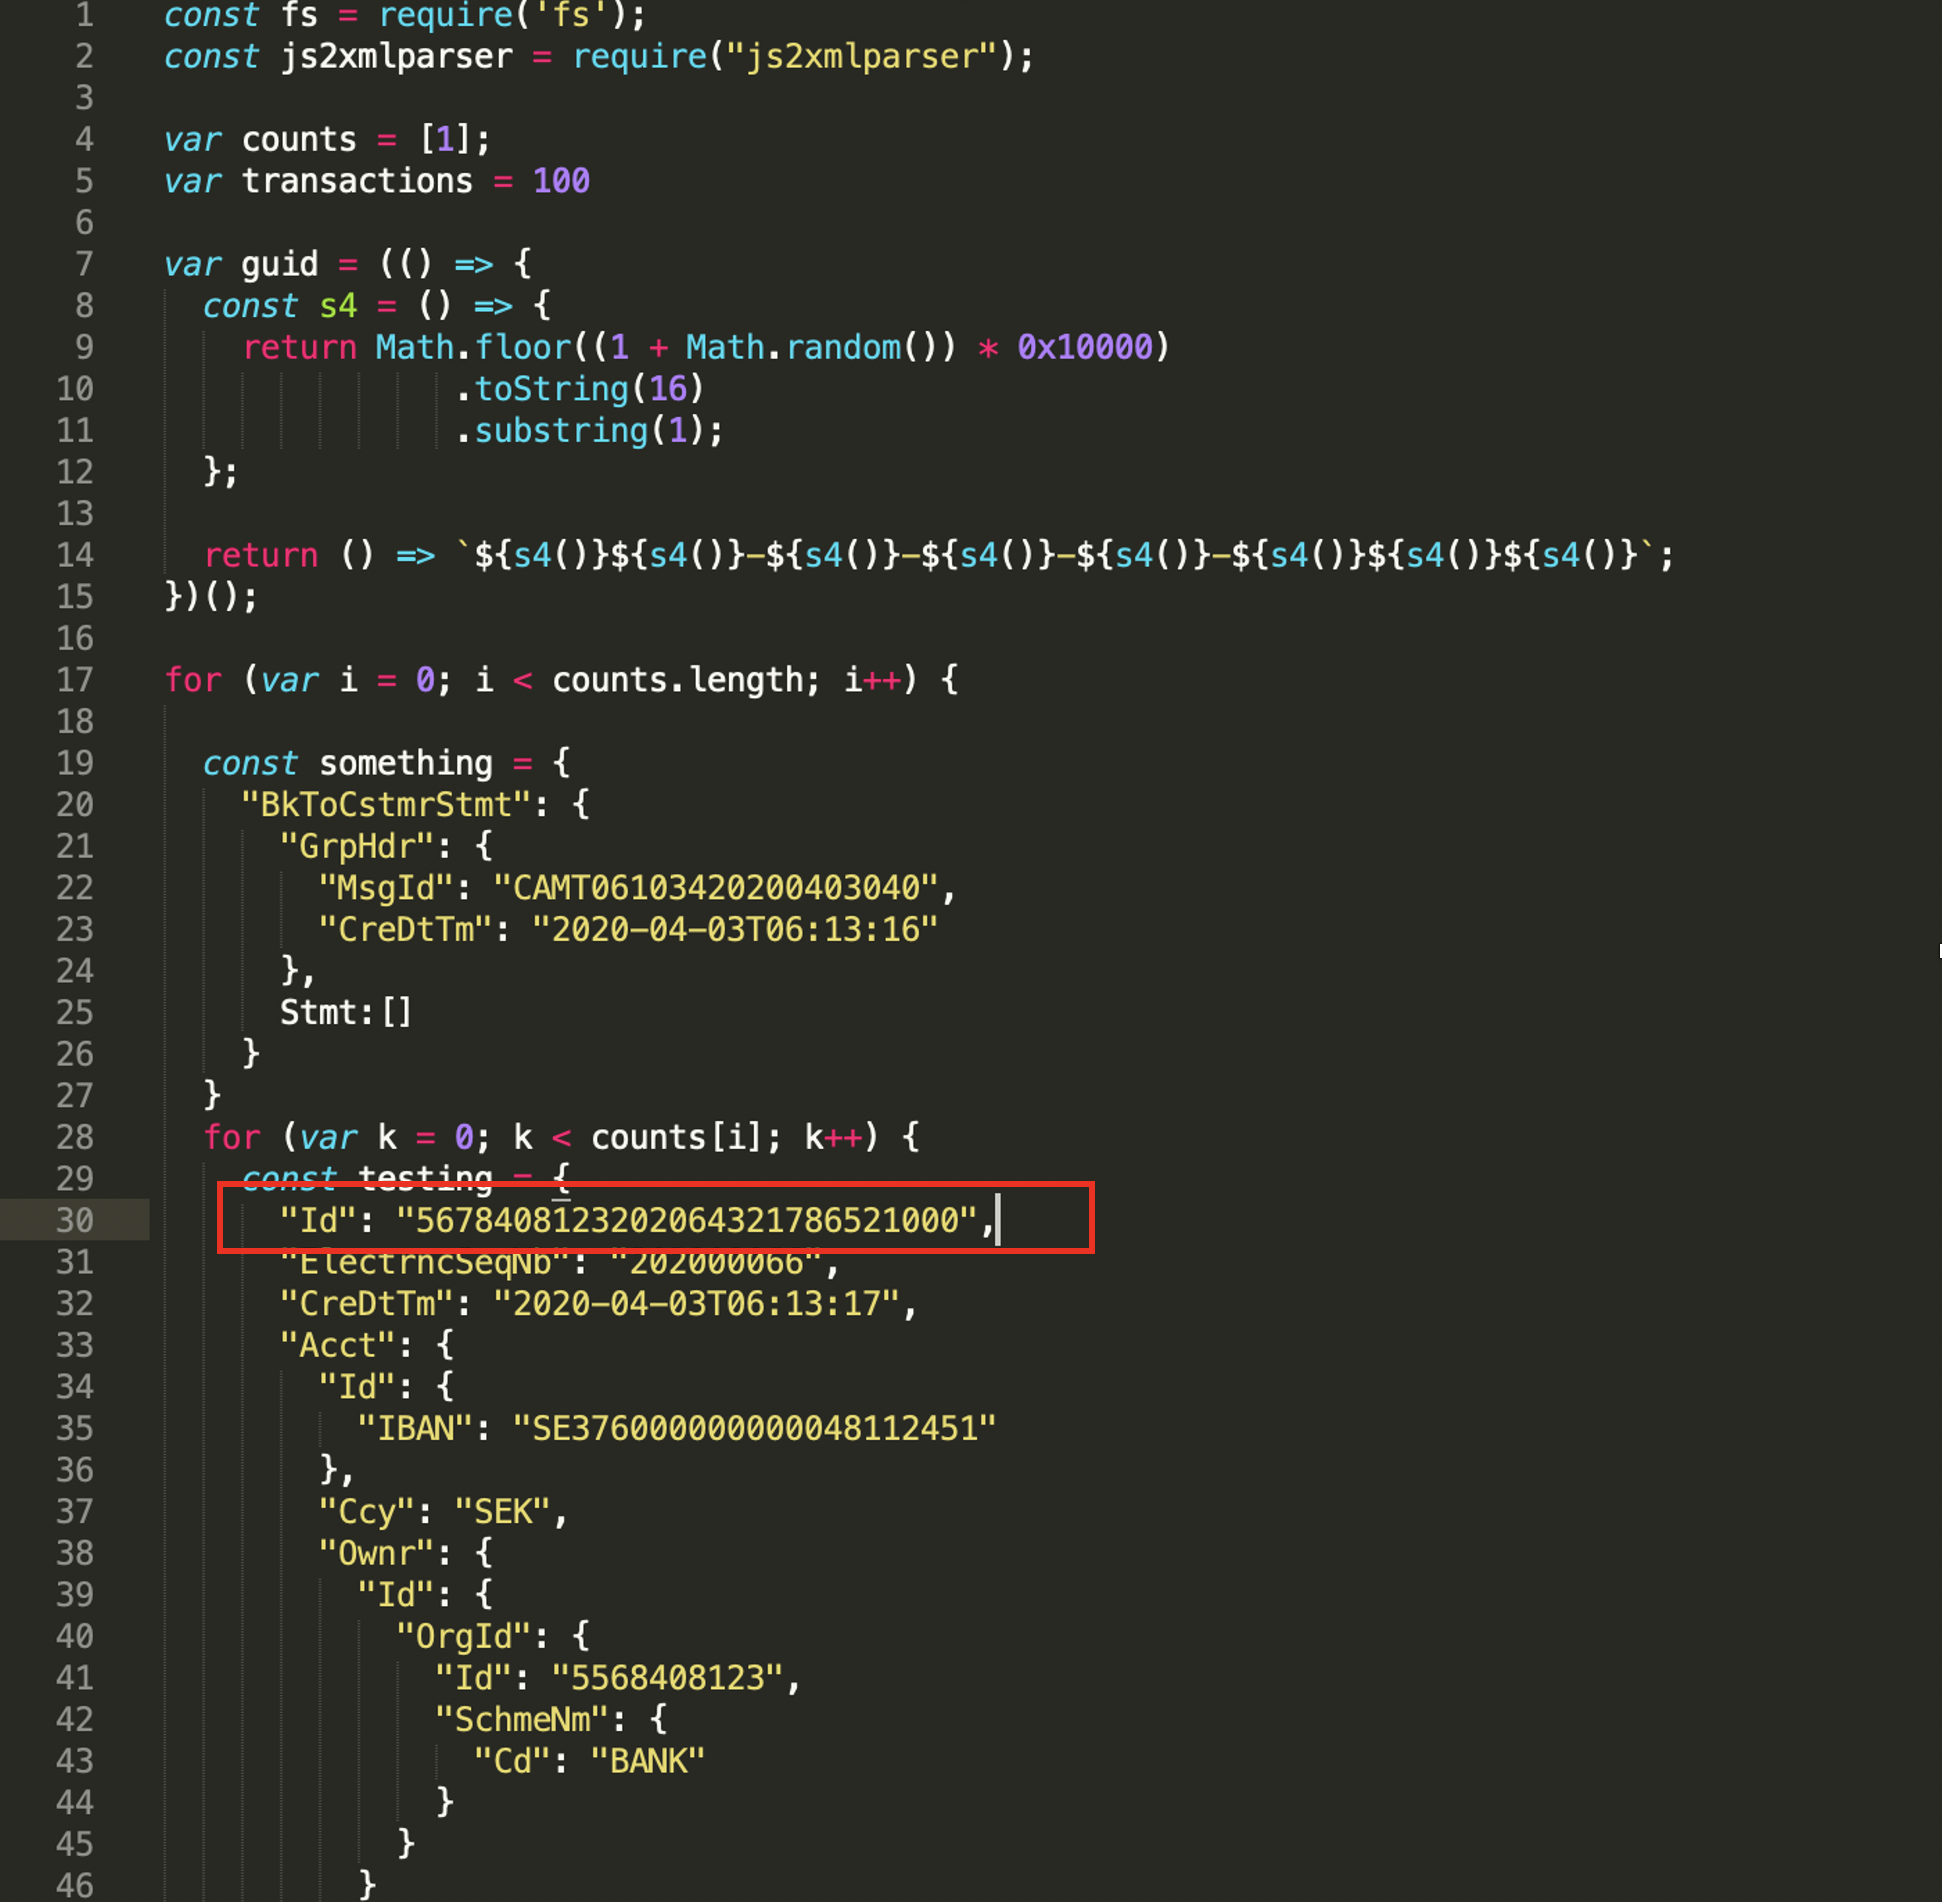
Before we can create a transaction import on the system a file needs to be generated using the provided scripts. For a CAMT053 file there is only one element of the script which needs to be updated, and this is the ID section, this value must be unique when submitting a file. The script and associated element are highlighted below:
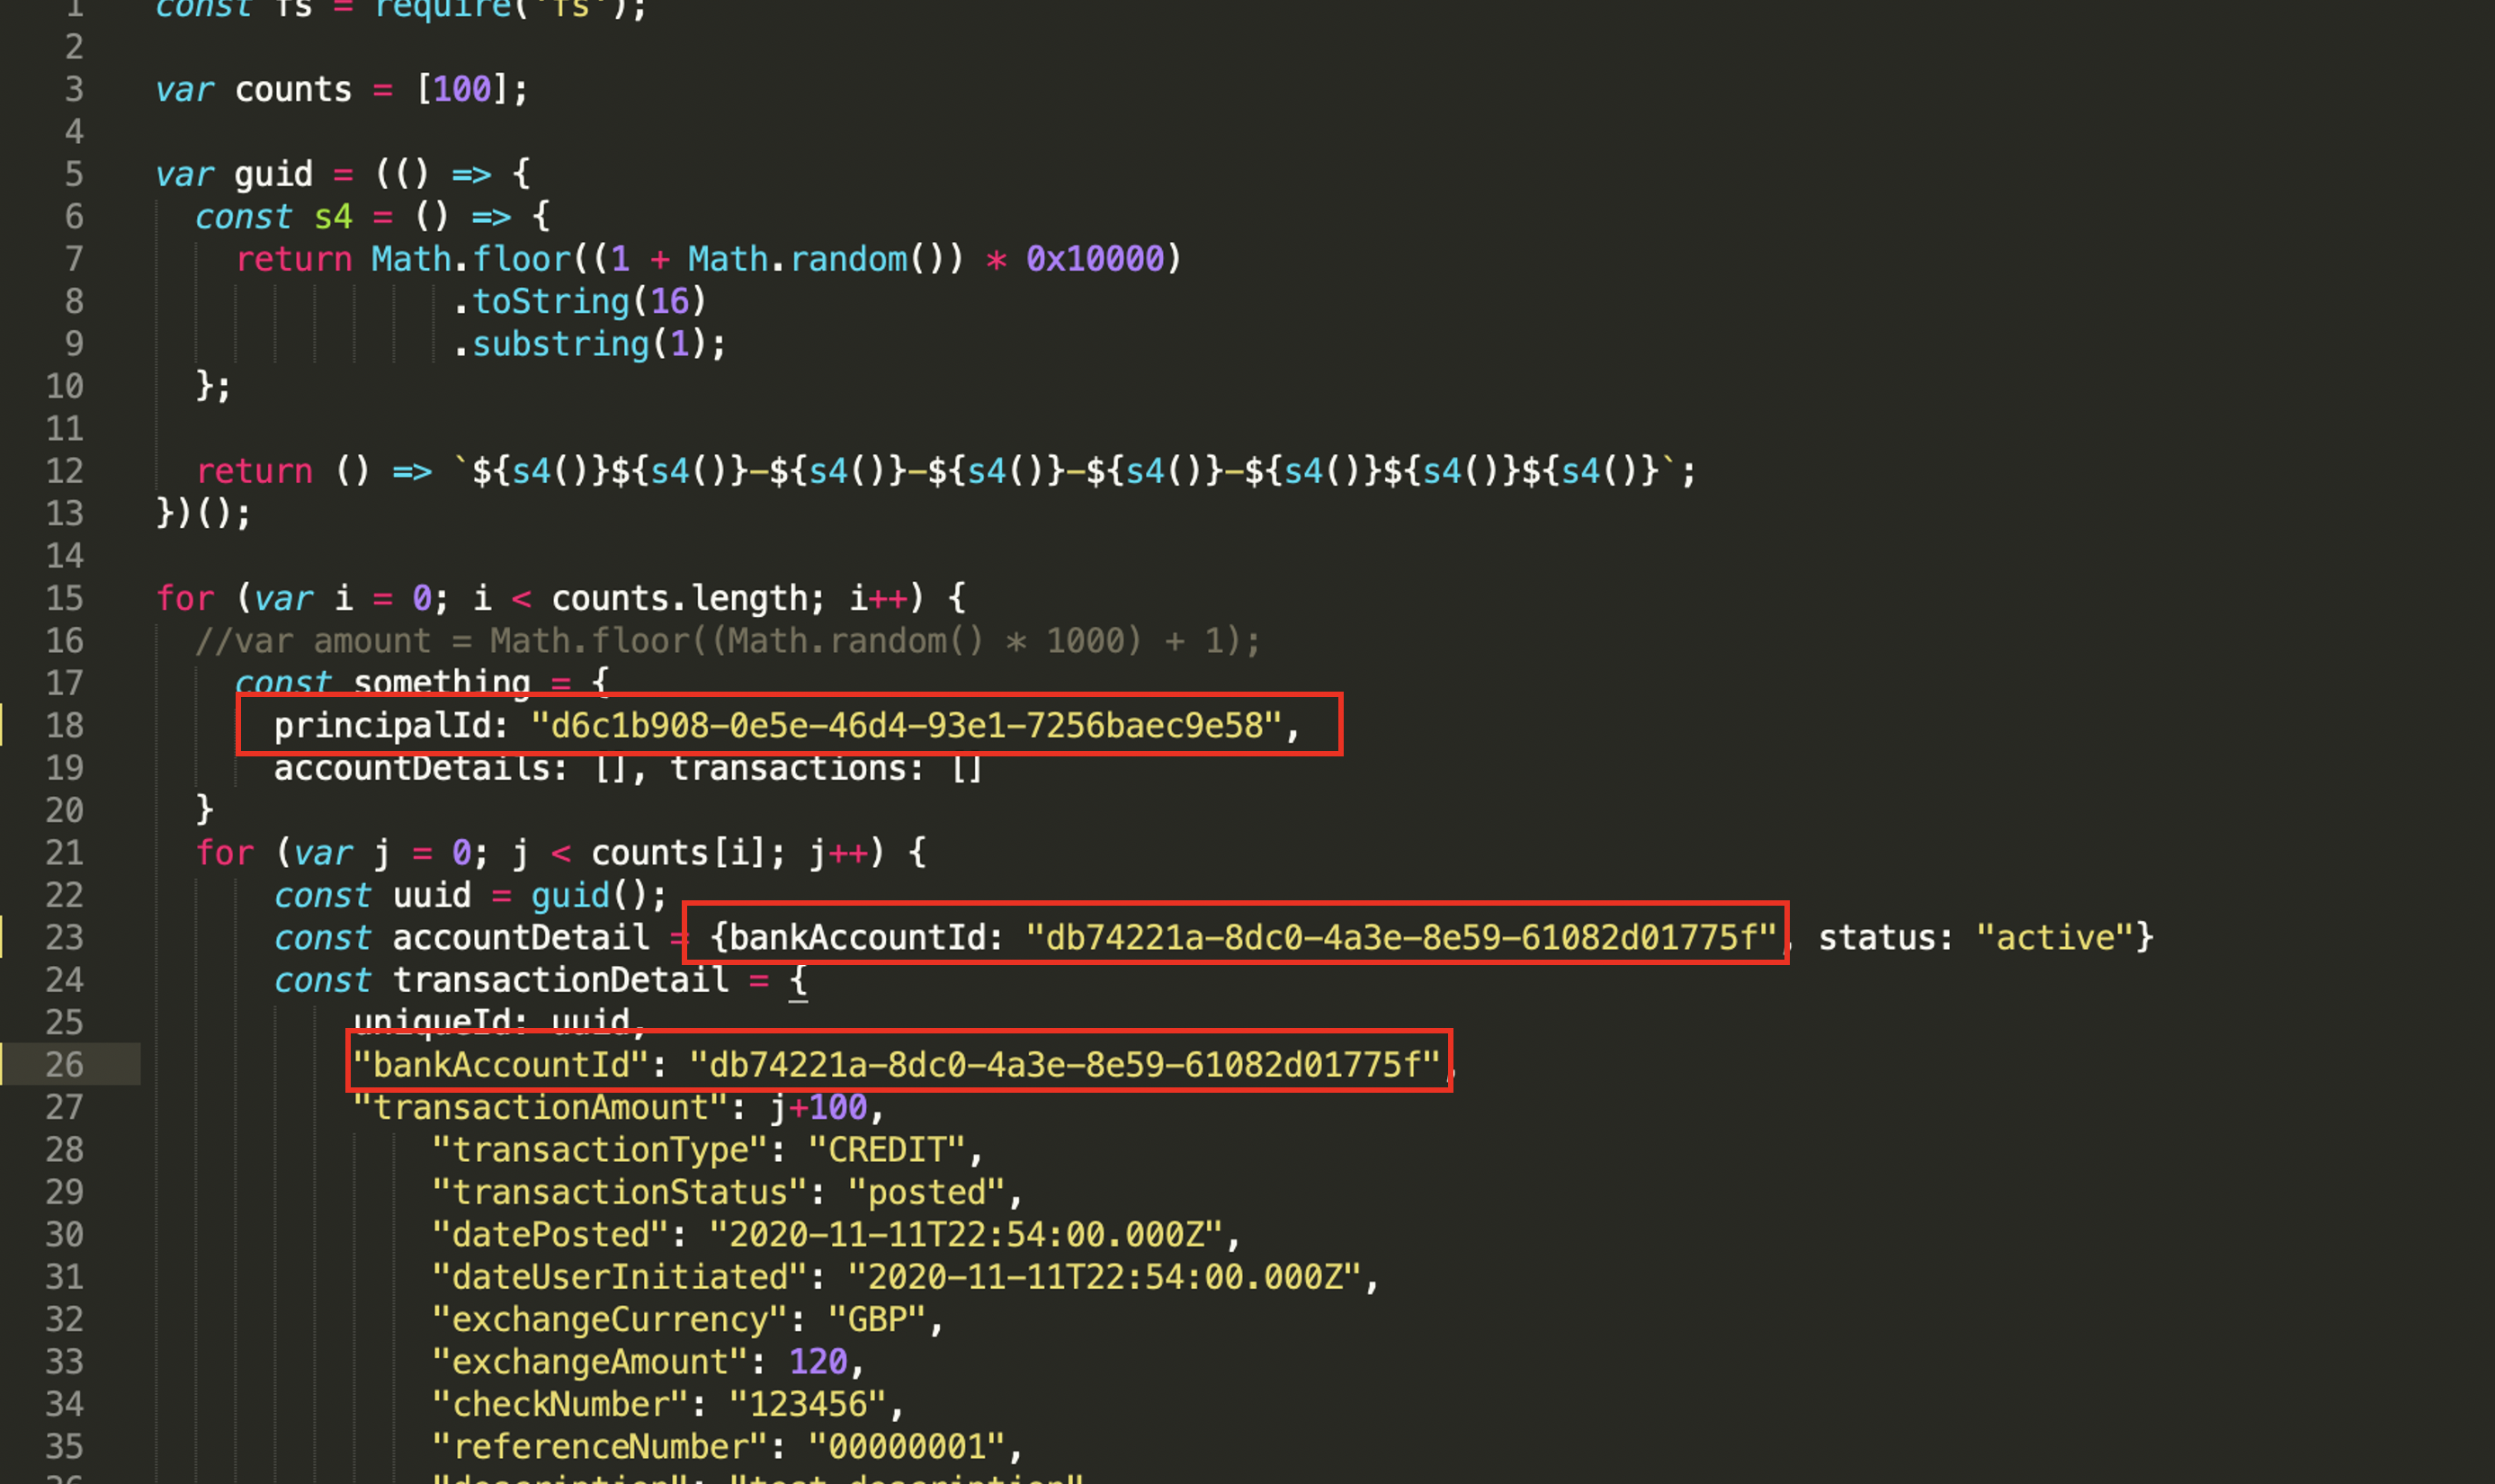
For a JSON transaction file there are a couple of items that need to be updated prior to running the script. First you need to take the organisationId from the POST / Organisations call and replace the principalId in the script, secondly take the bankAccountId from the POST bankAccounts call and replace both instances of the bankAccountId in the script with this value. All of the values that need to be updated are highlighted below:
Once the relevant script is up to date then it can be run from the terminal, both scripts as it stands will create a file containing 100 transactions in the requested format.
Submitting a transaction import
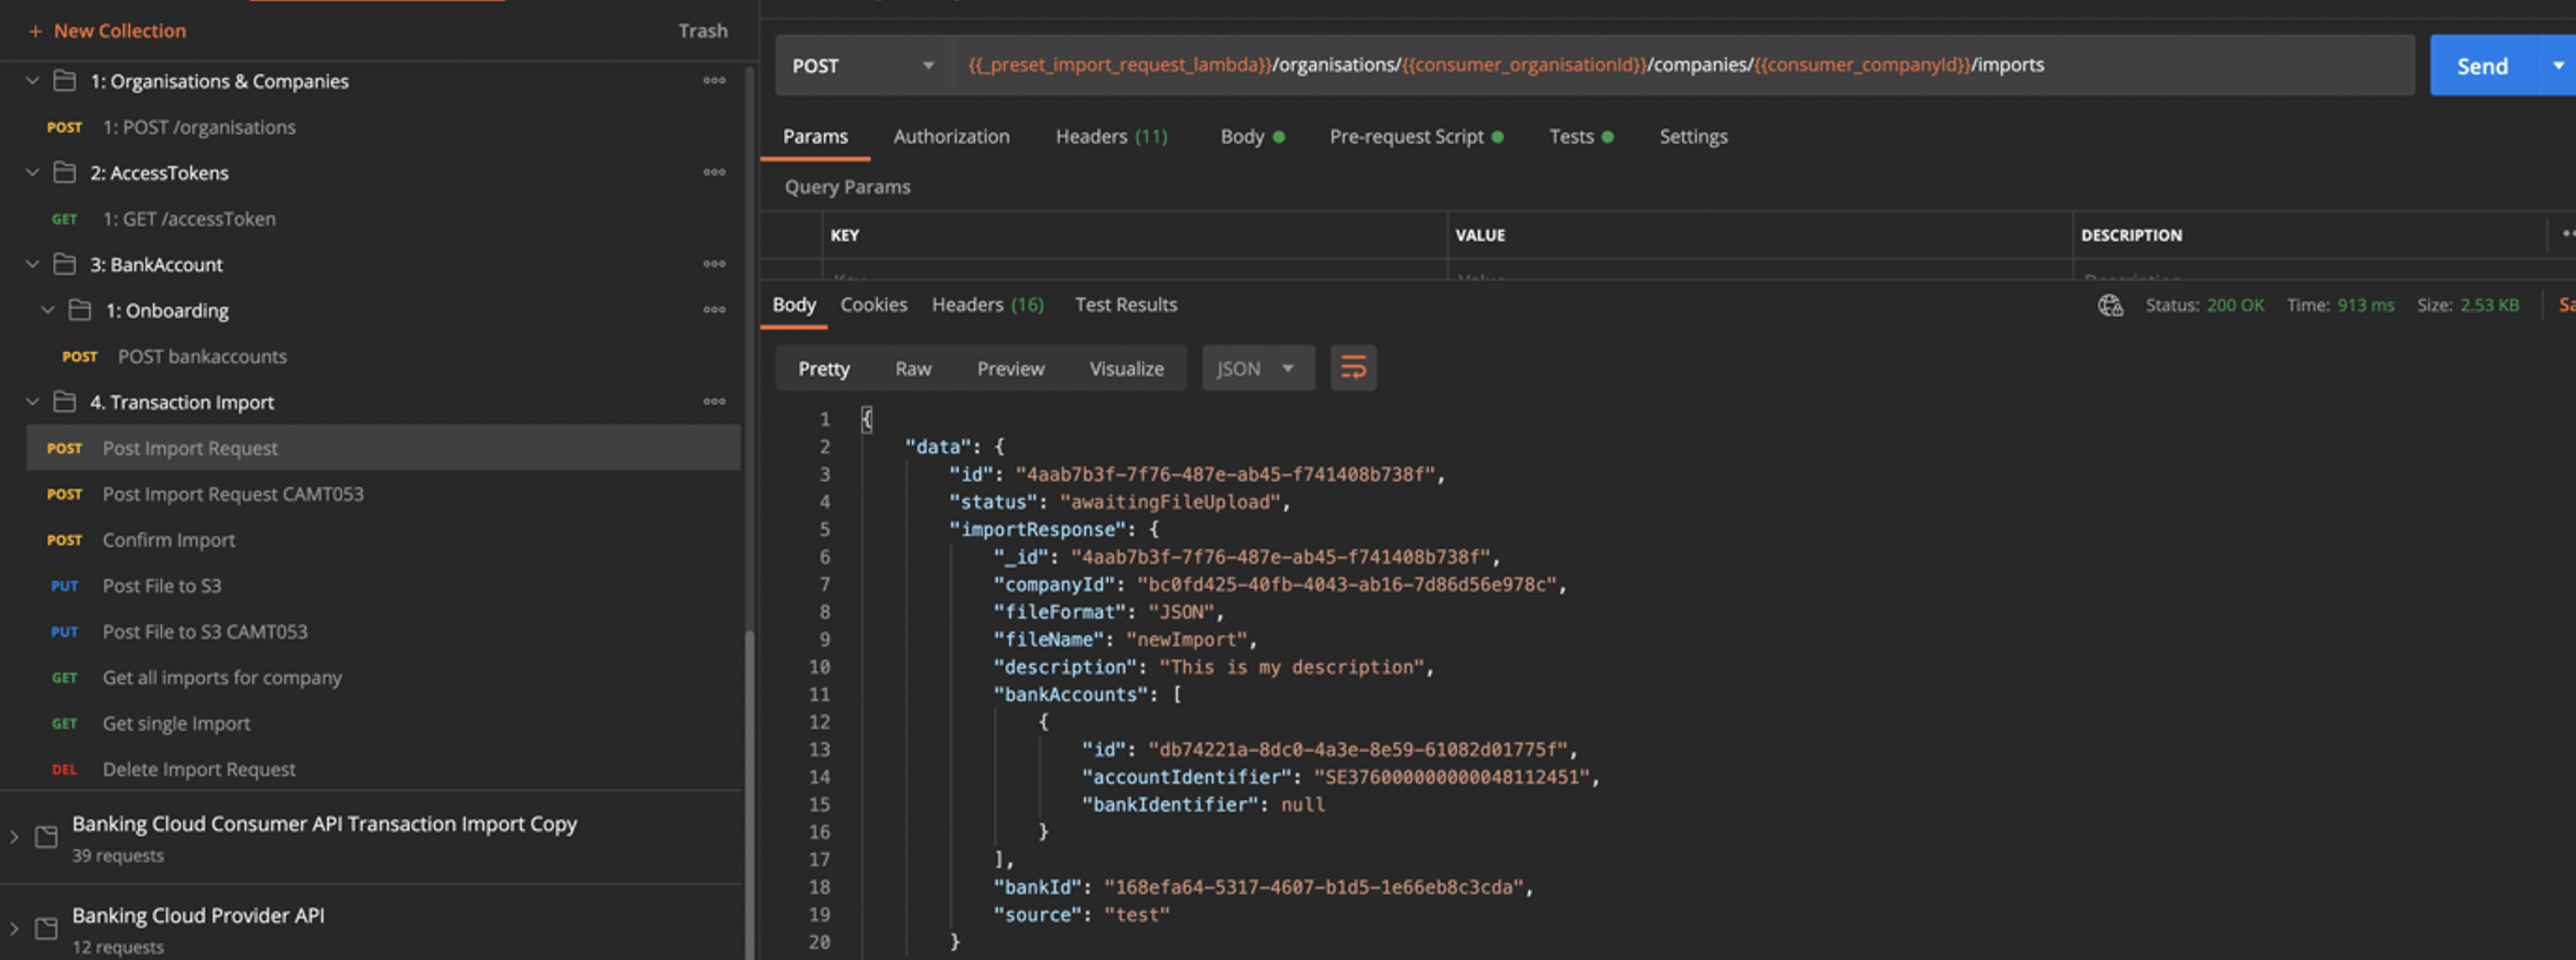
With the file created, you can then post a transaction import. There are two specific calls for this, one for JSON and one for CAMT053. These are both as follows:
JSON
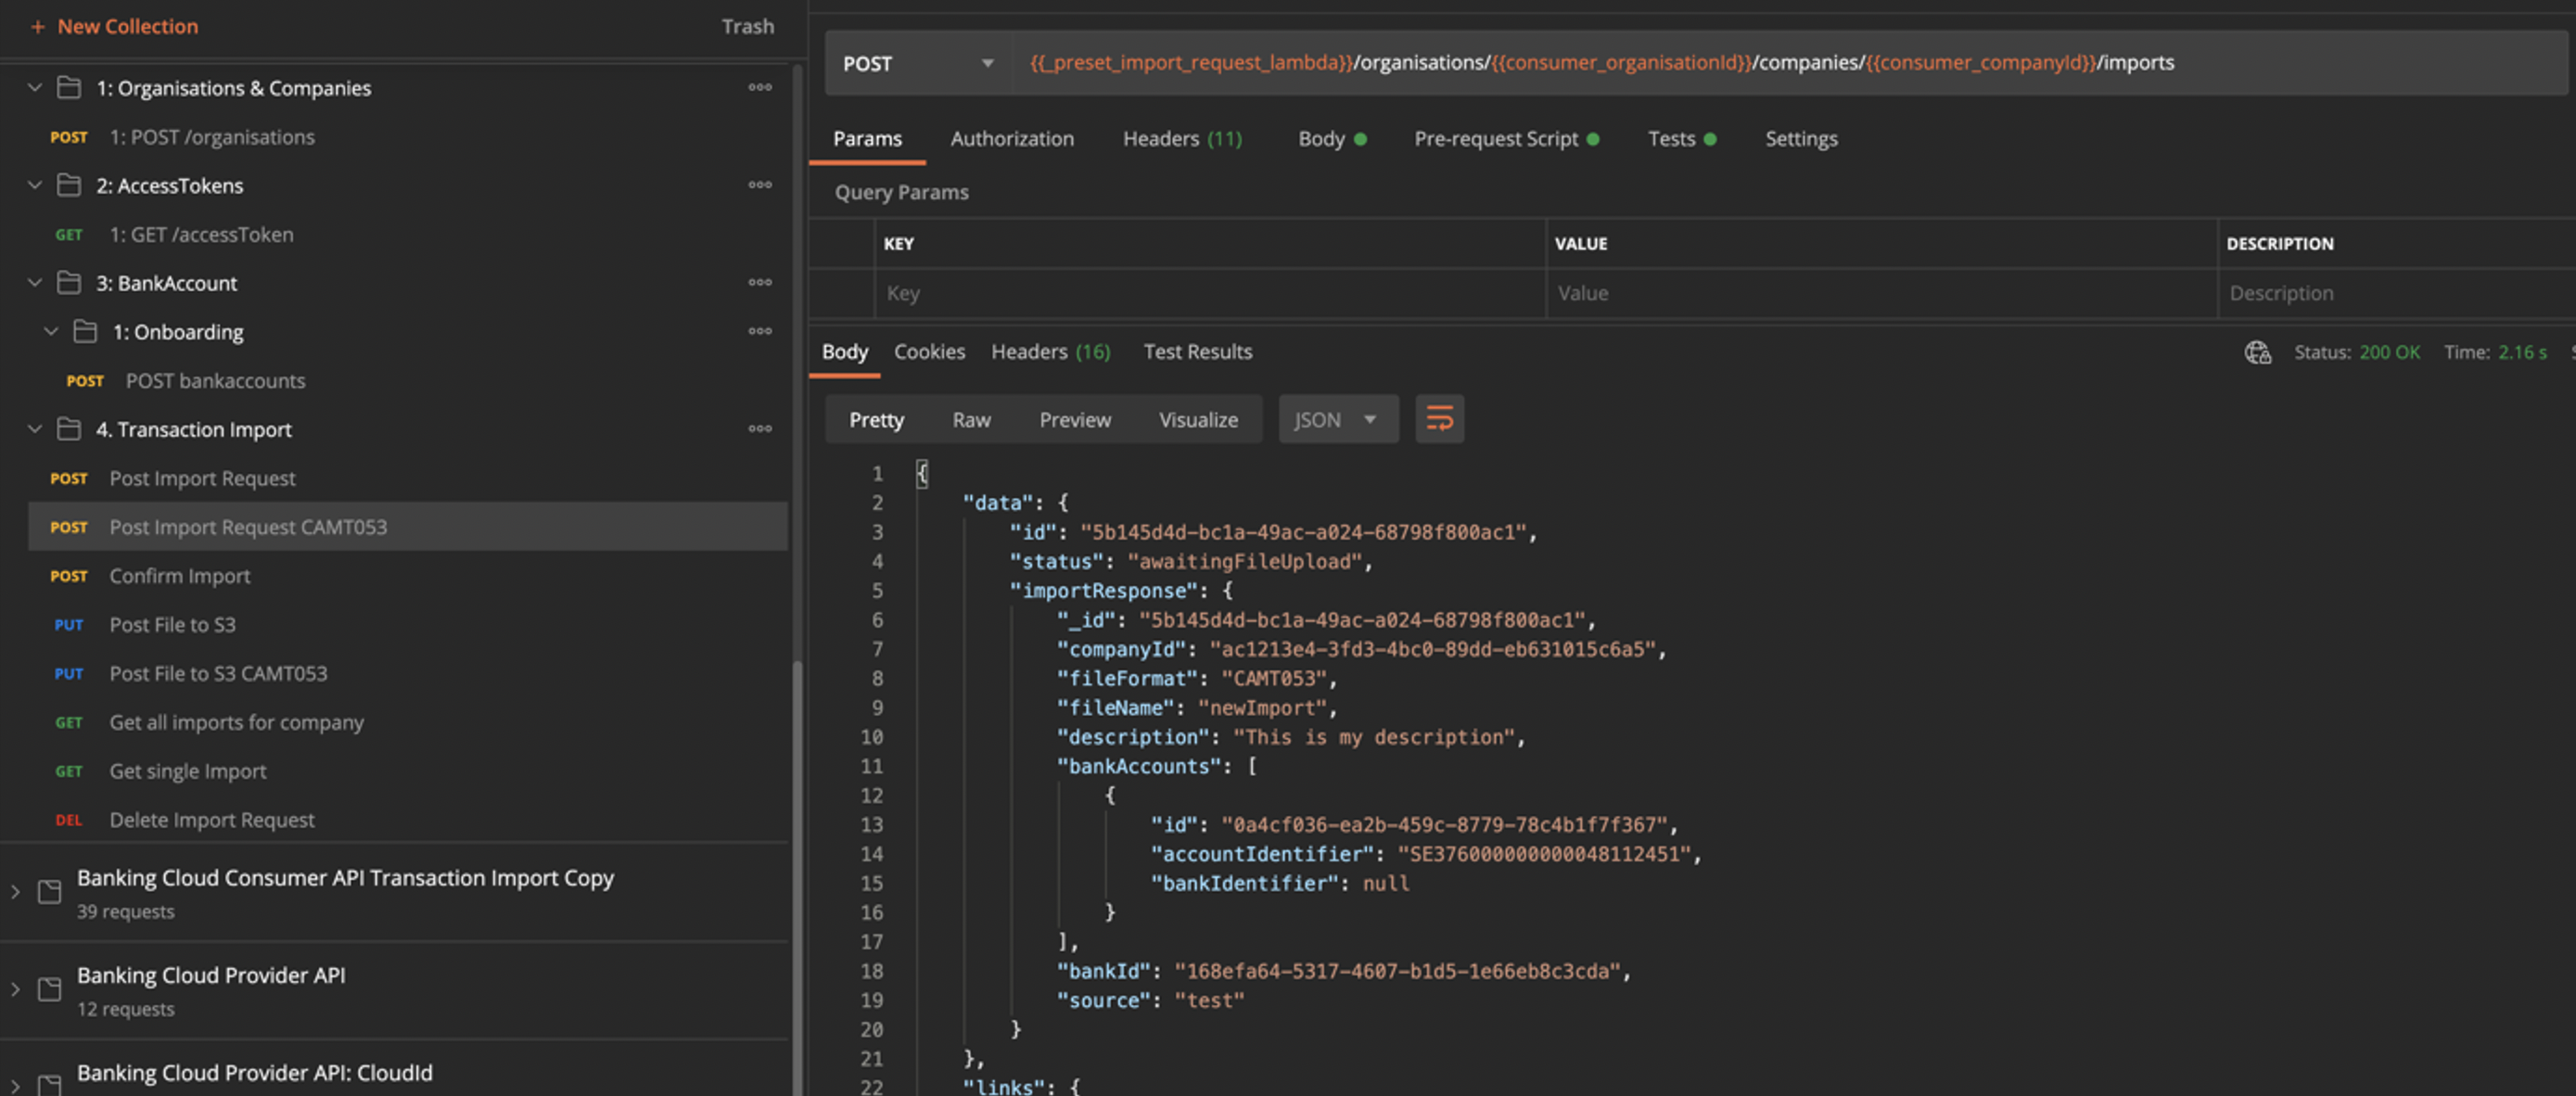
CAMT053

Once you have created an import using either of the above calls, you can then submit the matching transaction file, there are two separate calls for these and these are shown below. For each call you need to update the file in the body section of the call to the one which you have just created.
JSON
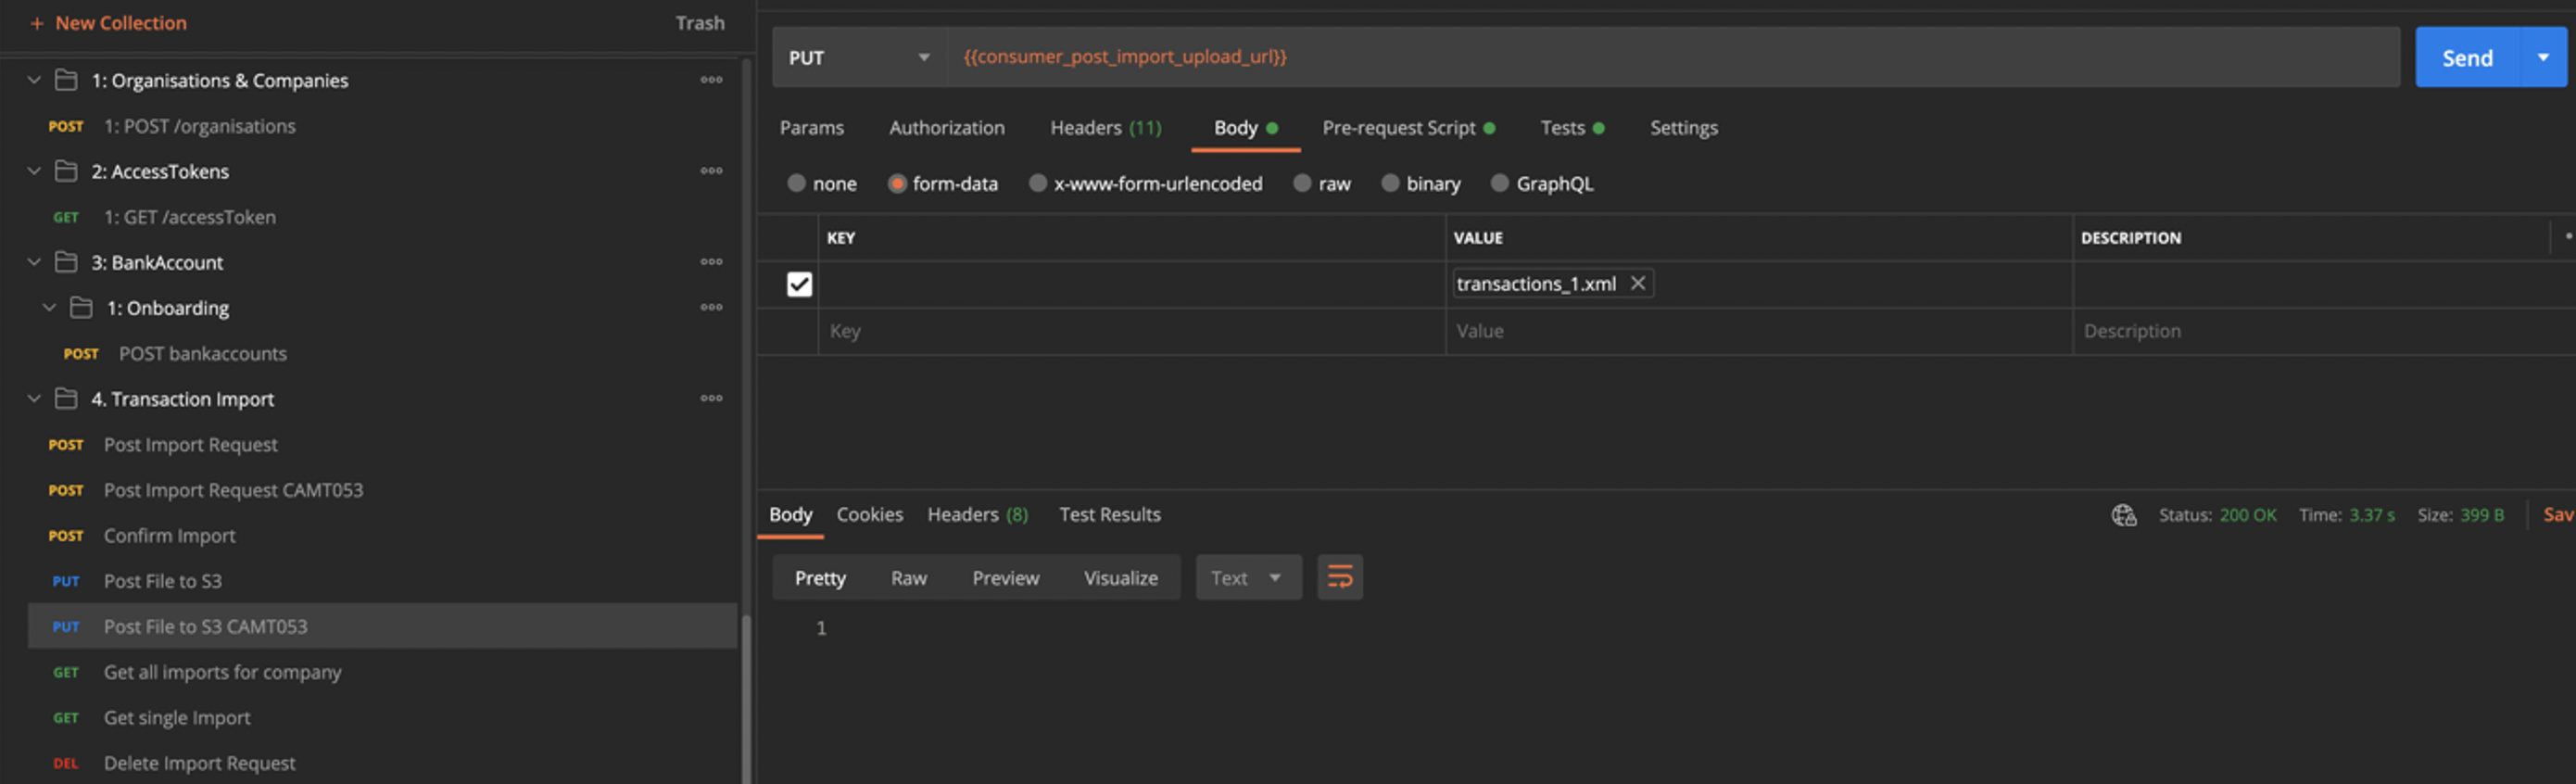
CAMT053
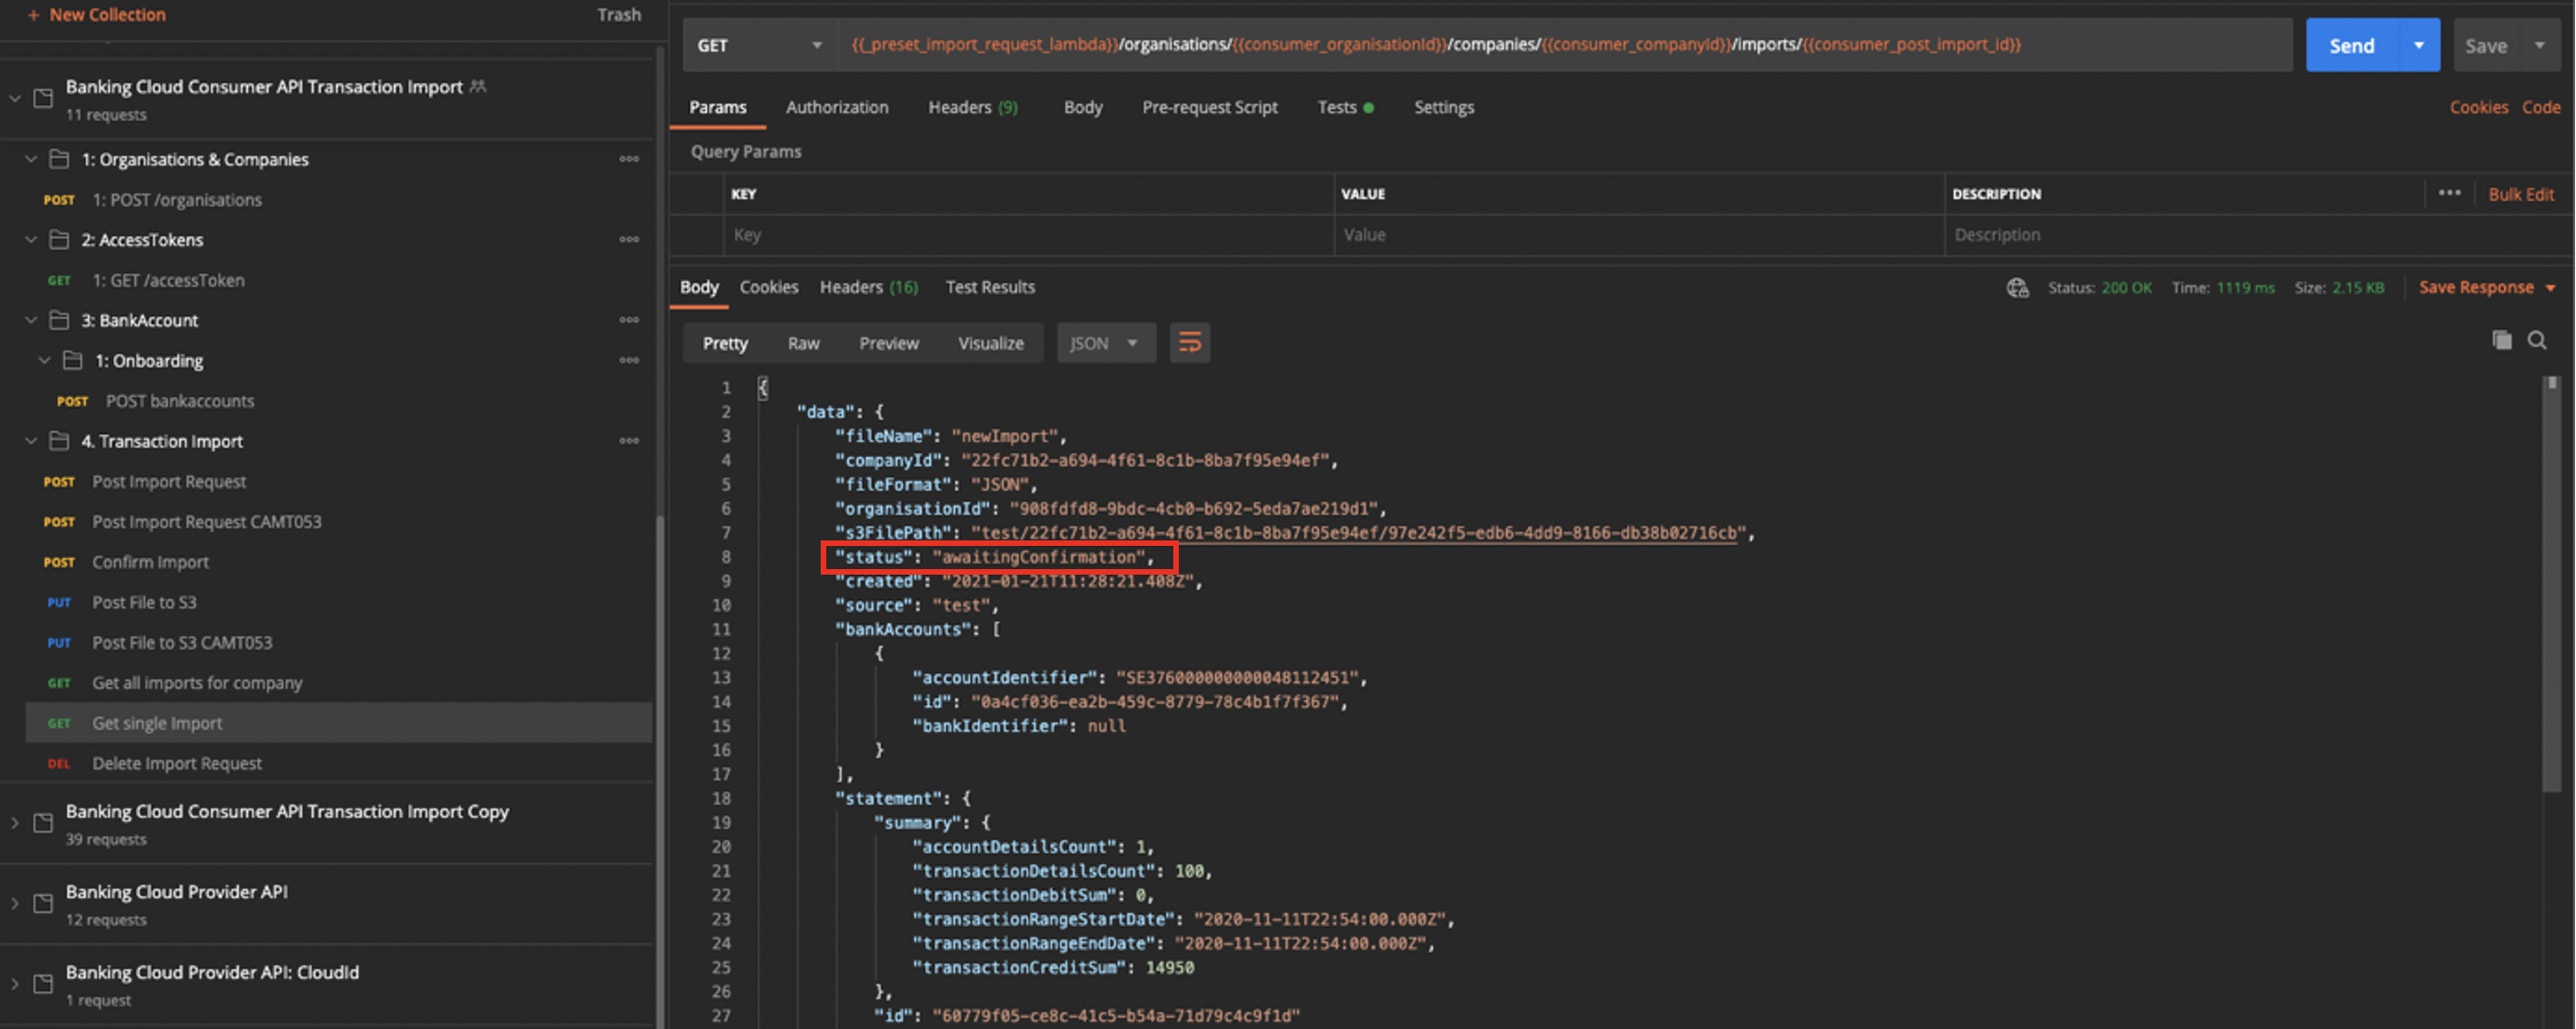
After submitting the files, you can monitor the status of the import using either the Get all imports for company, or Get single import calls. These will return the transaction import record included within this will be the status, once the status has updated to awaitingConfirmation then the Confirm import call can be ran:
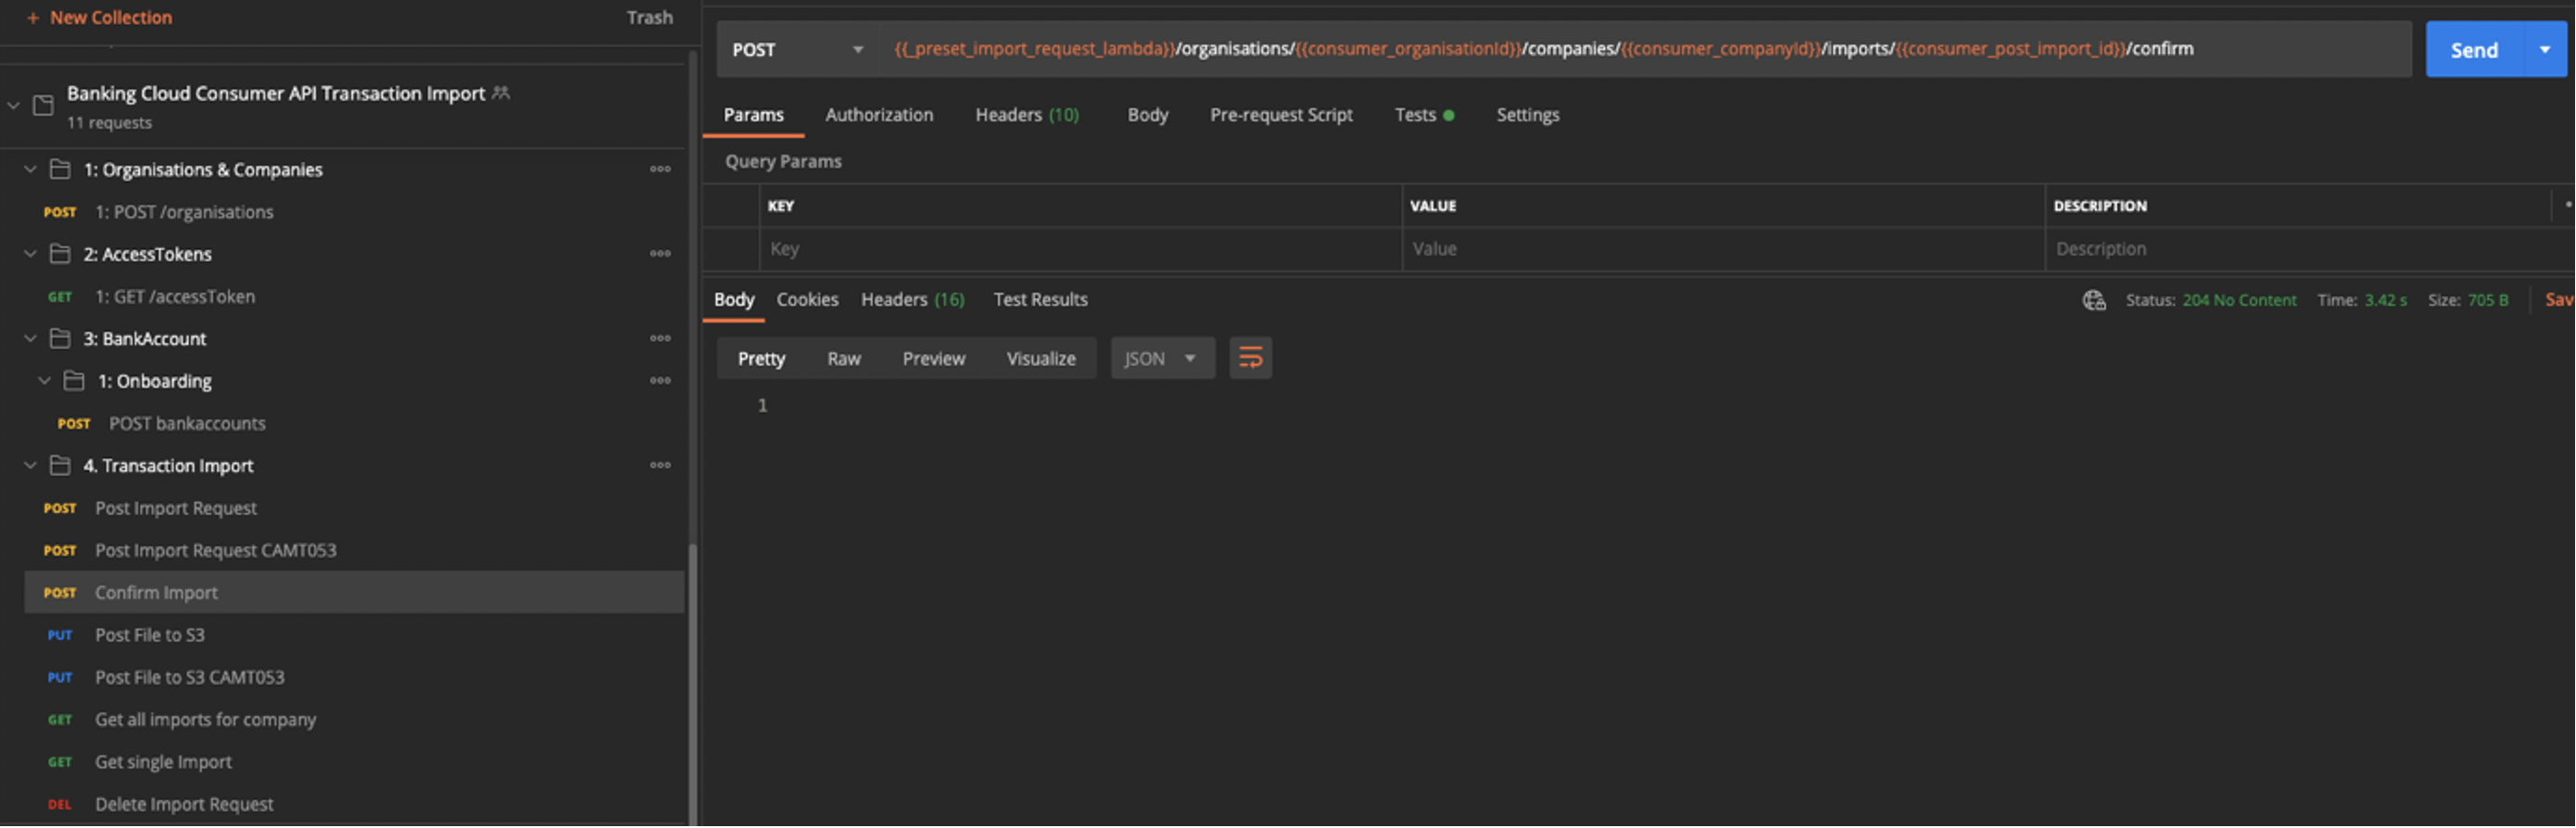
Once the Confirm import call has been ran, continue to monitor the status of the import using the calls above until the import reaches a status of either complete or error.
This is the full process of the transaction import, the only extra call is the Delete import request. This can be used to stop processing at any point, but it can also be used at the end of an import to delete the import and the associated elements.