How to Create Your First App
Less than to read
To send authenticated requests to the Sage Accounting API, you need to register your app.
You will receive a client_id and client_secret in return, which you will use to obtain access tokens during
authentication.
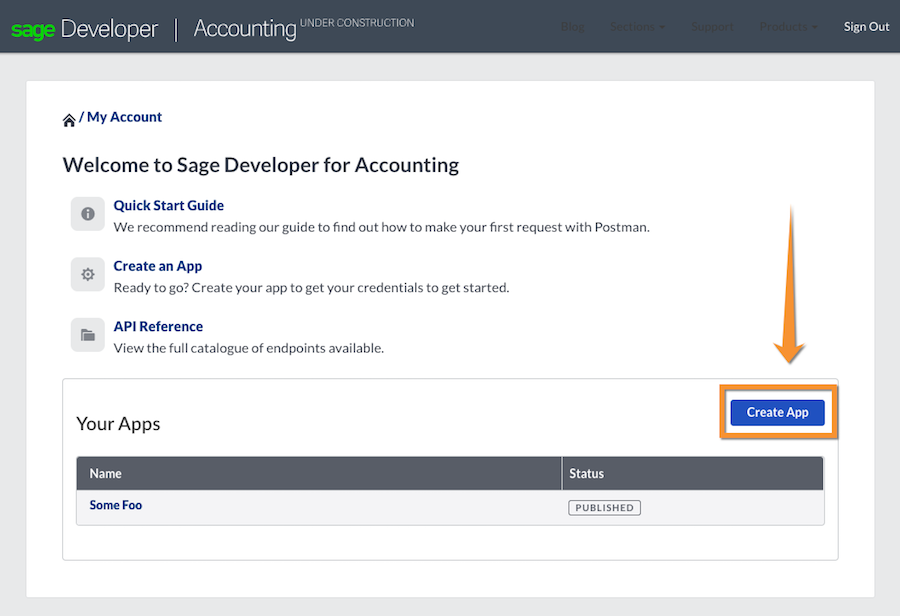
After signing up for a developer account, there is no app in your apps list:

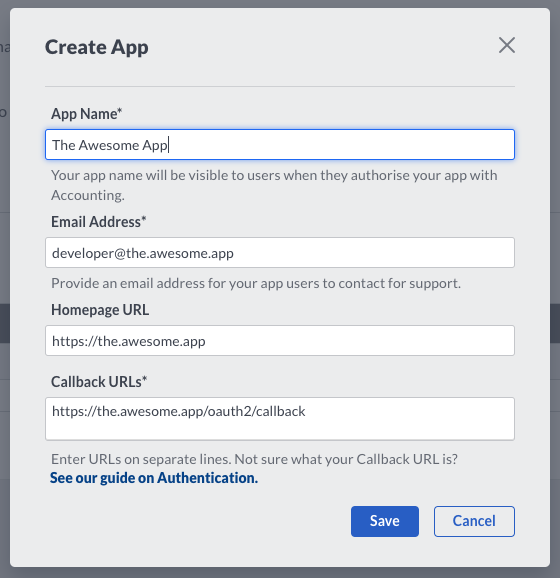
Click on the Create App button to enter the details of your app.

App Name: The name of your app. This will be displayed to Sage Accounting users authorizing your app. This field is required.Email Address: An email address that Sage can use to contact you when there are issues with this app. The address you provide here will not be displayed to Sage Accounting users. This field is required.Homepage URL: The URL of your app’s website. This field is optional, but when given, it will be displayed to Sage Accounting users.Callback URLs: The URLs Sage Accounting may redirect users to after allowing or denying access to their data for your app. You can enter up to 100 addresses here and must provide at least one. Use a new line for each URL. Please note that you must usehttps://as scheme except for local hosts, wherehttp://is allowed as well.
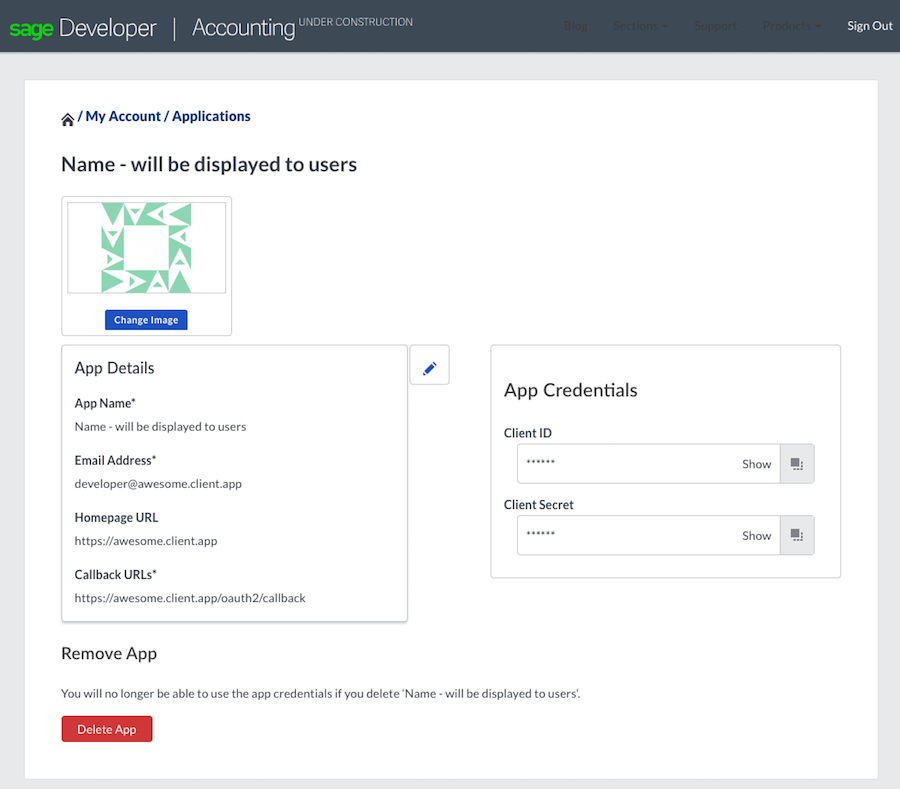
After clicking on Save, your app is created. Click on its name to see the details for the newly created
app.
App Details

To edit name, homepage or callback URLs, click on the small pencil. To see your Client ID and your Client Secret, click
on Show right in those fields. You can also copy the values to your clipboard by clicking on the clipboard icon
next to the field. You will need both values for the
OAuth2 Authentication.
Uploading an App Image
You can upload an symbol image that will be displayed to Sage Accounting users during authorization. We recommend an
image size of 250 x 250 pixels. To upload the image, just drop the file onto the existing image or click on the
Change Image button.