Post your test data
Less than to read
This section should only be followed if you have already gone through the previous steps listed here.
Now that you have everything set up to create some test data, lets do just that.
Using the Postman Runner
Select the collection named SBC Accounting Data Creation, and the main window should have 4 tabs for this collection. Now select the option in the top right to Run.
This will open a new Runner tab, and list out all of the requests available in the collection.
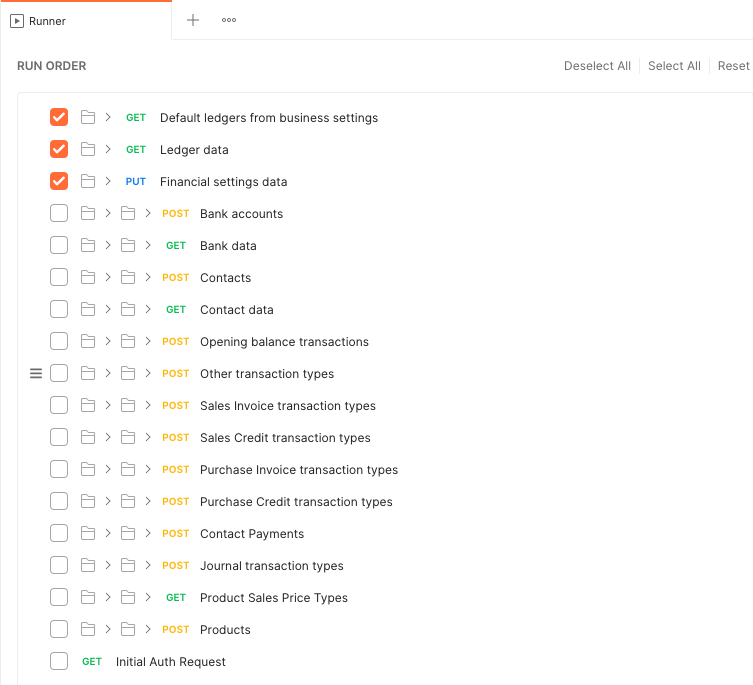
Some of the requests are required, and the others are optional. Feel free to only process the data for the modules you want to work with (the required requests are detailed in the table below).
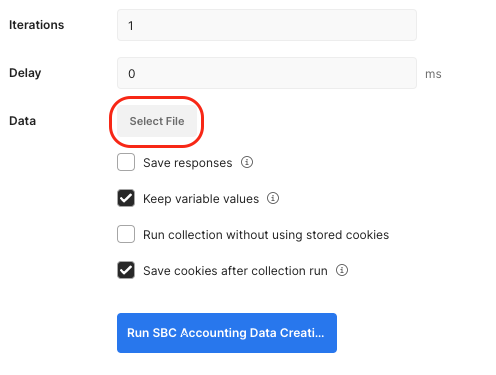
The POST requests require the addition of a data file which is relevant to that module, looking below you select the file via the Select File button on the right of the runner:
How to use the collection and data files
Next we will look at which requests are required, which data files need to be used with each request and the order to process them in.
Request order
In order to create the data you must perform the requests in order, as defined by the runner order column below. You can perform all of the requests in Runner Order 1 at the same time, the next two in Runner Order 2 and so on.
For a more indepth walkthrough see here.
As some of the requests require the use of a data file, we advise you locate the SBC_Accounting.Data.zip you downloaded earlier and extract it to a directory of your choosing. For the requests that require the use of a data file, simply tick the request(s) and choose Select File, then browse to the directory you extracted the SBC_Accounting.Data.zip to and locate the data file listed in the table below.
| Request | Required | Data file | Runner Order |
|---|---|---|---|
GET Default Ledgers from business settings |
Yes | - | 1 |
GET Ledger data |
Yes | - | 1 |
PUT Financial settings data |
Yes | - | 1 |
POST Bank accounts |
Yes | bank_accounts.json | 2 |
GET Bank data |
Yes | - | 2 |
POST Contacts |
Yes | contacts.json | 3 |
GET Contact data |
Yes | - | 3 |
POST POST Opening balance transactions |
Yes | opening_balances.json | 4 |
POST Other transaction types |
No | other_payments.json | 5 |
POST Sales Invoice transaction types |
No | sales_invoices.json | 6 |
POST Sales Credit transaction types |
No | sales_credits.json | 7 |
POST Purchase Invoice transaction types |
No | purchase_invoices.json | 8 |
POST Purchase Credit transaction types |
No | purchase_credits.json | 9 |
POST Contact Payments |
No | contact_payments.json | 10 |
POST Journal transaction types |
No | journals.json | 11 |
GET Product Sales Price Types |
No | - | 12 |
POST Products |
No | products.json | 13 |
As the runner processes each request, you should see that each request returns a 200 OK HTTP STATUS message.
Once the requests are complete, click the New button in the top right to process the next run.
Required requests
Using the Postman Runner in order, the first 8 requests will be sufficient to have set up the financial year, ledger accounts, bank and contacts created along with their opening balances. This following walkthrough will take you through the steps required to achieve that.
Walkthrough
This section will take you step by step through the 4 initial runs you must go through in order to process the required requests.
First Run
For our 1st run we will click Deselect All at the top of the Runner window, then select the 1st three requests as per the table above:
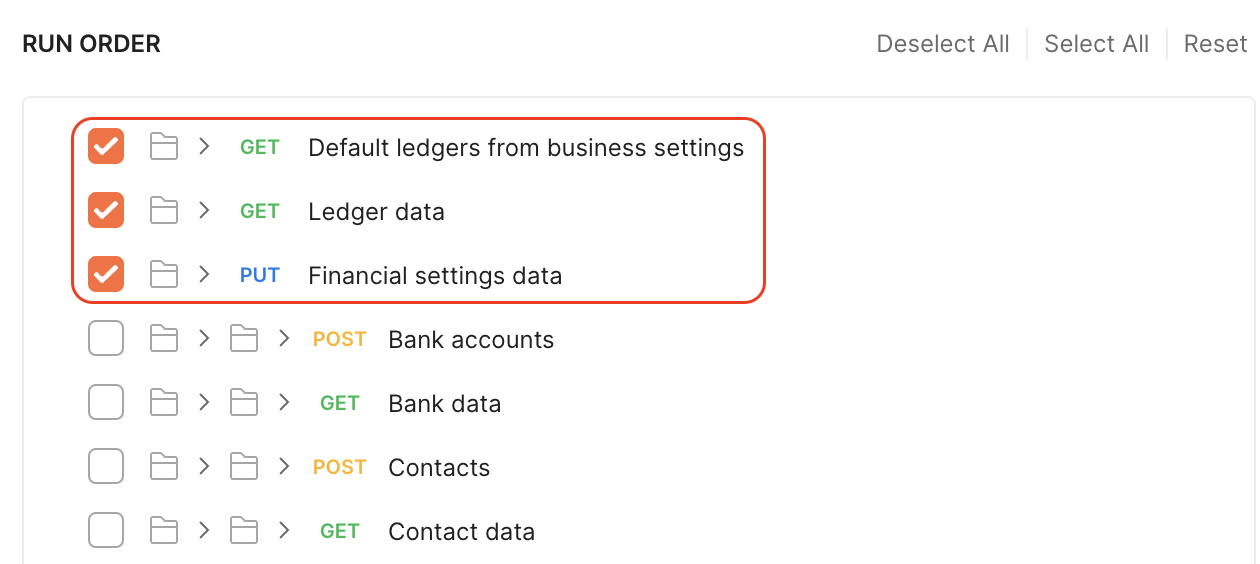
Now click Run:

We don’t require any data files for these requests, as they are all retrieving data, or amending existing settings. When all 3 requests have ran with successful 200 OK responses, click New to move on to the next run.
Second Run
In this next use of the runner we can select both bank_accounts and bank_data, but as we are starting to POST data we also need to select a data file from those we downloaded earlier.
Click the button to Select File and browse to the location of your unzipped SBC_Accounting_Data.zip, and select bank_accounts.json.

Now click Run:
When this run has passed through 6 iterations you should see a combination of 201 Created and 200 OK responses. Click New to move on.
Third Run
Next we have the contacts and contacts_data to POST and GET, again we select the requests followed by the Select File option. This time select the contacts.json file and choose Run:
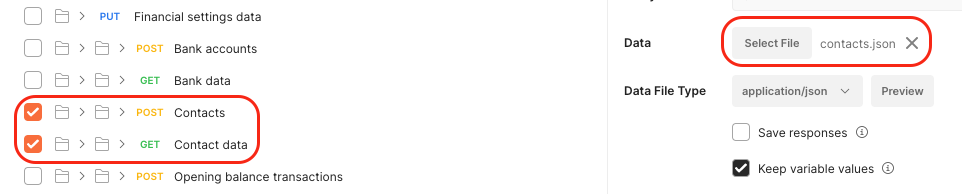
Now click Run:
There are more contacts to process in this run, so it can take a minute or two to complete. Again, you should see a combination of 201 Created and 200 OK responses. Click New once all 45 interations are complete.
Fourth Run
Our final required run will add opening balances to our contacts and is a single request. Choose Opening balance transactions, followed by Select File and select the opening_balances.json file.

Finally, choose Run:
Once all 29 iterations have returned 201 Created successful responses, choose New to add the optional requests.
If you would like to add transactions from the other areas of Accounting, simply tick the box next to the request for the transaction type you want, and choose the data file from the table that corresponds, in the same way we completed the fourth run with opening balances.
Once you’ve ran through all of the requests you want to, and successfully posted all of your test data you are all done and ready to start working with the transactions and records we’ve created.
Possible errors
If there are any issues in successfully posting the remaining transactions, it’s possible that when an error is returned, Postman will have cleared the contents of the environment variables for both your current access_token and refresh_token.
It’s likely that you’ll notice it first when seeing 401 Unauthorized status responses returned for each request made by the runner.
Should this occur, simply click on the GET Initial Auth Request listed on the left in the collection, and repeat the previous step found here that details how to use the intial auth request to re-authenticate and obtain a new valid refresh token. Ensure you add the valid refresh token to the environment as indicated, and then retry the next run.
The Future
We will be looking to improve the offering for you to add test data to your test accounts in the coming months, but would welcome collaboration with the developer community on this, in part to both expand the requests available, such as products and services or if anyone would like to share better methods when using Postman for this kind of process.
We’ll update the docs when we have the files available on GitHub.
Next: Continue Developing