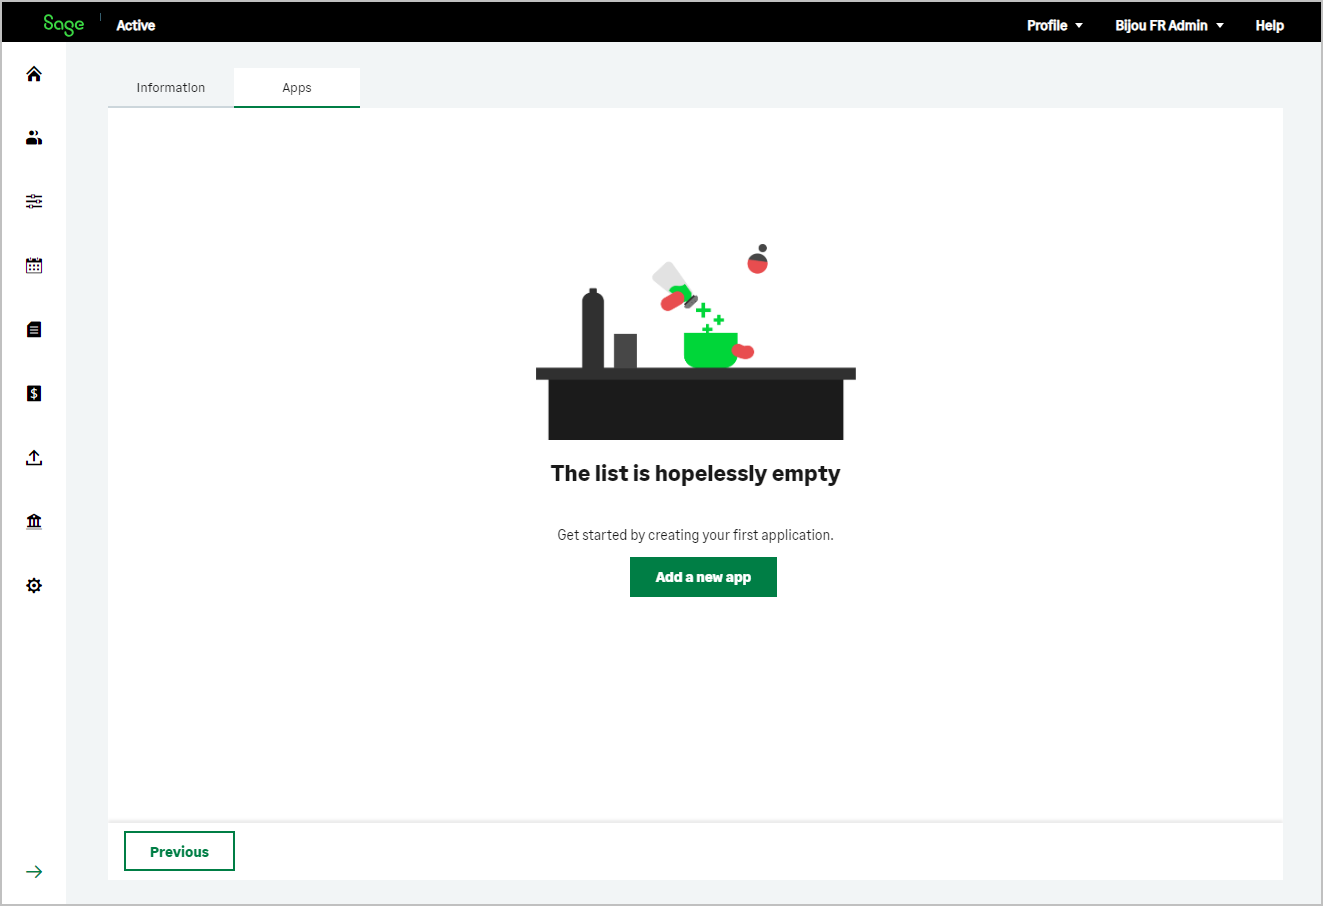
Click the Apps tab or the Next button.
A screen prompts you to add your first application, click on the button Add a new application
Create an app to get your keys
Quick Links
Accounts Accounting Entries Products Customers Sales quotes Sales invoices Suppliers Purchase invoicesYou must now create your first app and associate it with Sage Active Public API V2 to obtain a Client ID, a Client Secret and a Subscription Key necessary to access Sage Active data.
After choosing to associate this app with Sage Active Public API V2 you will get its keys.
1. Add a new application
2. Defining a new application
The screen for defining a new application appears
- Identify your application, all this information can be used to publish the description of your application.
- Qualify the type of application desired
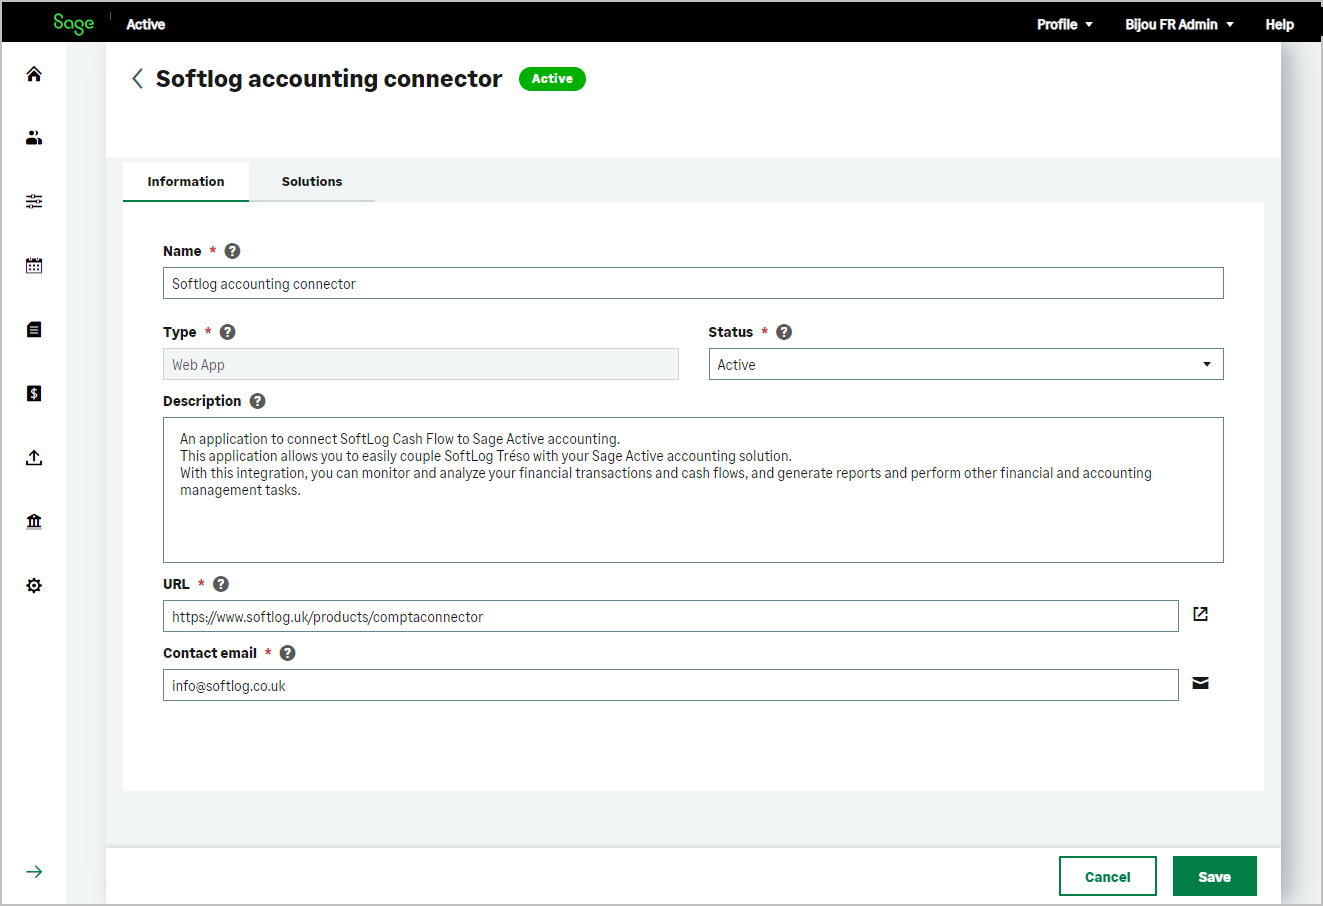
- Name: User-friendly title of the application.
- Description: Clear explanation for a customer describing the interest of your application.
- Url: A link to one of your sites providing more detailed information about your application.
- Contact email: An email address that your customers or Sage can use to contact you about your application.
- type
- Web Application: classic web application that can use a Client Secret.
- Mobile Application: native application for mobile, for security the Client Secret is not used.
- Single Page Application: a web application accessible via a single web page, for security the Client Secret is not used
Attention
In the context of this quickstart, please choose Web Application to remain consistent with the rest of the journey.
3. Defining the Sage active solution
You will now choose the Sage Active solution.
Note
This interface is designed to allow you to develop applications using several public APIs.
Here, you will decide whether your application can function in different Sage Active markets, and consequently, on various Sage Active production solutions.
For instance, if your application can be offered for both the French and Spanish markets, you will need to provide parameters for both the Sage Active Public API FR and the Sage Active Public API ES.
For more information, refer to Key concepts / Environments.
- For example, choose Sage Active FR by clicking on the chevron to activate it.
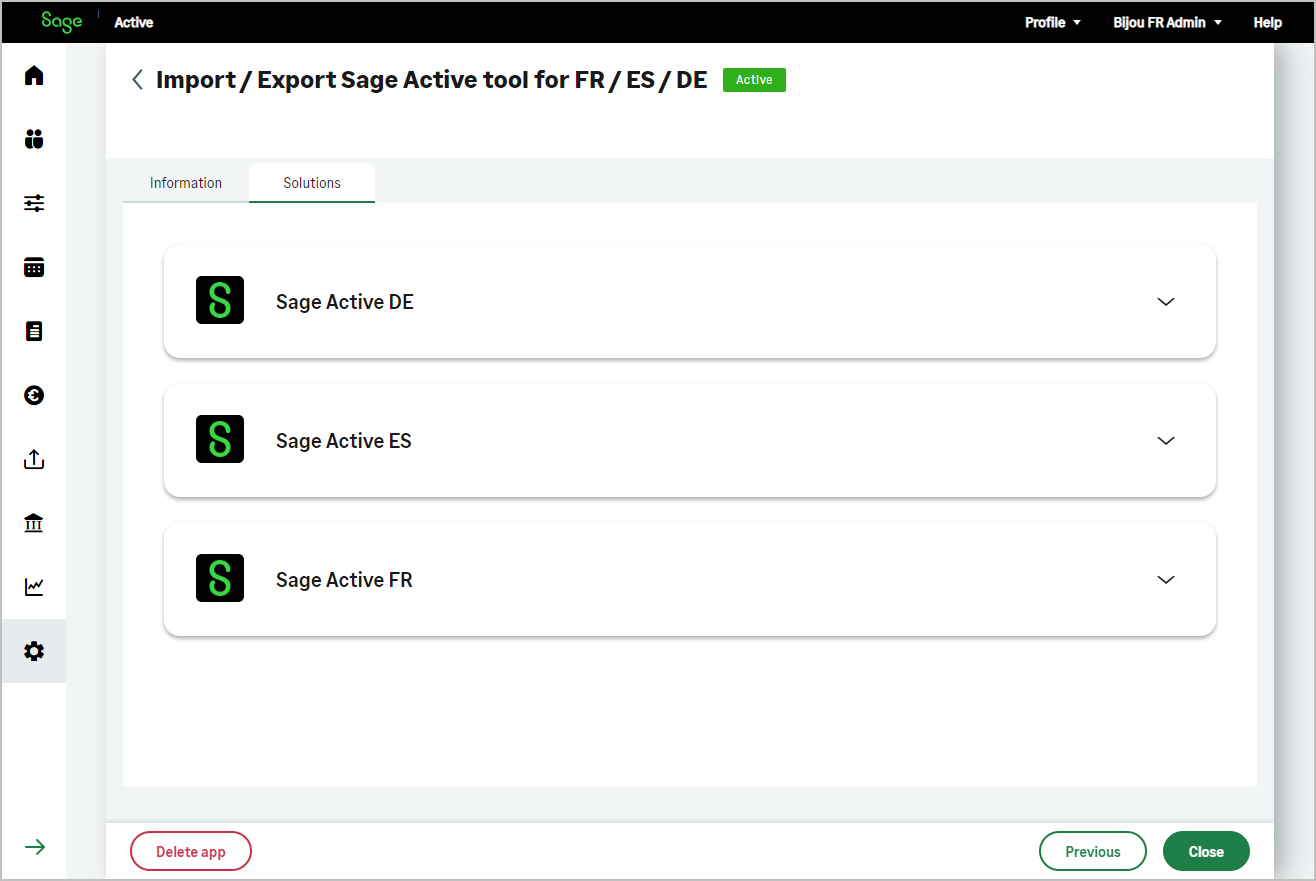
- The API information form appears.
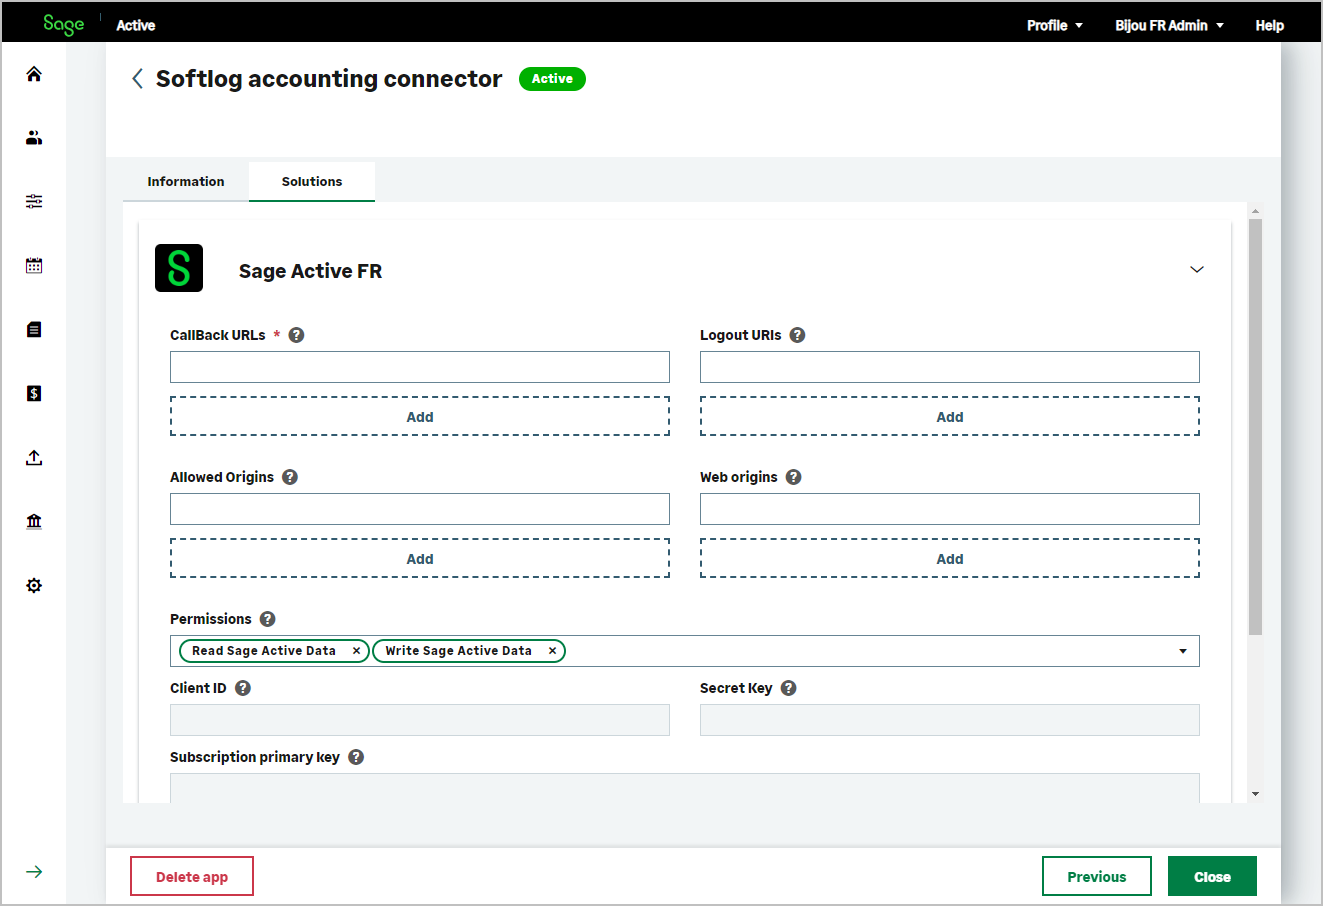
- Qualify the form information.
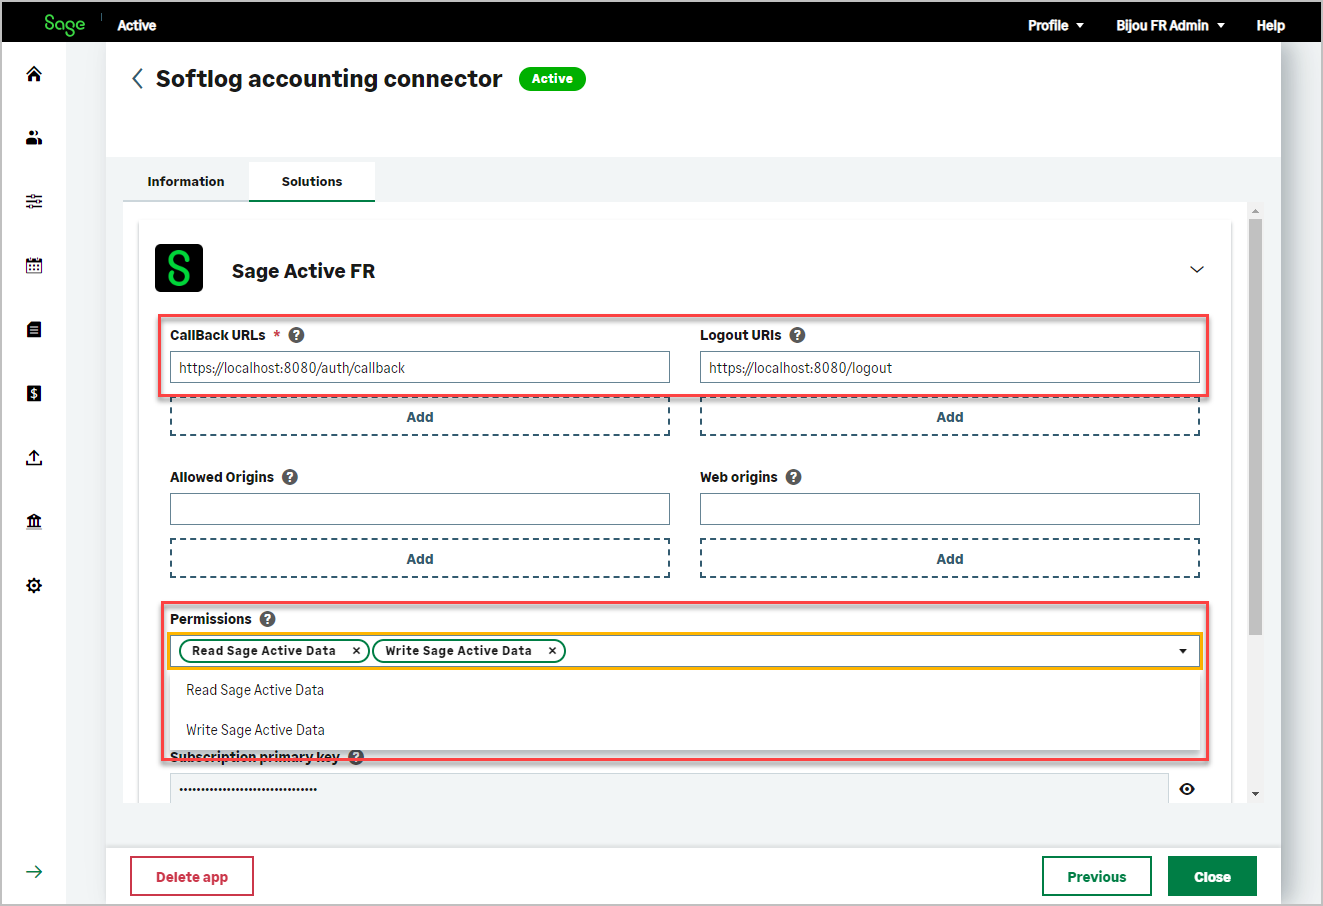
- Callback URLs: List of authorized Callback URLs. You must fill at least one URL.
If you are using Postman Web, then the callback URL is imposed by Postman.
You will need to add this callback URL : - Logout URL: List of authorized Callback URLs.
- Permissions: Permissions required by your application, by default Read and Write.
Attention
In the context of this quickstart, please choose Read Sage Active Data and Write Sage Active Data to remain consistent with the rest of the journey.
You can also define several other URLs according to the needs of your application:
- Allowed Origins: Authorized URL for call from Javascript to Auth0.
- Web origins: Url authorized for request using Cross-Origin-authentication.
Tip
For each type of URL you can define several URLs to test your application in different environments.
Click Add button to add a new field.
4. Retrieve Your Client Credentials and Subscription Keys
-
Once the information is filled in, click on the Save button.
YourClient ID,Client Secret,Subscription keysare then generated.Client ID,Client Secretwill be needed to authenticate your application to Sage Active Public API V2.Subscription keysare used to follow the consumption of Sage Active Public API V2.- Click on the eye icon to the right of the Client Secret to reveal it
- You can renew the Client Secret at any time by clicking on the Renew icon, be careful in this case you will have to update it in your application.
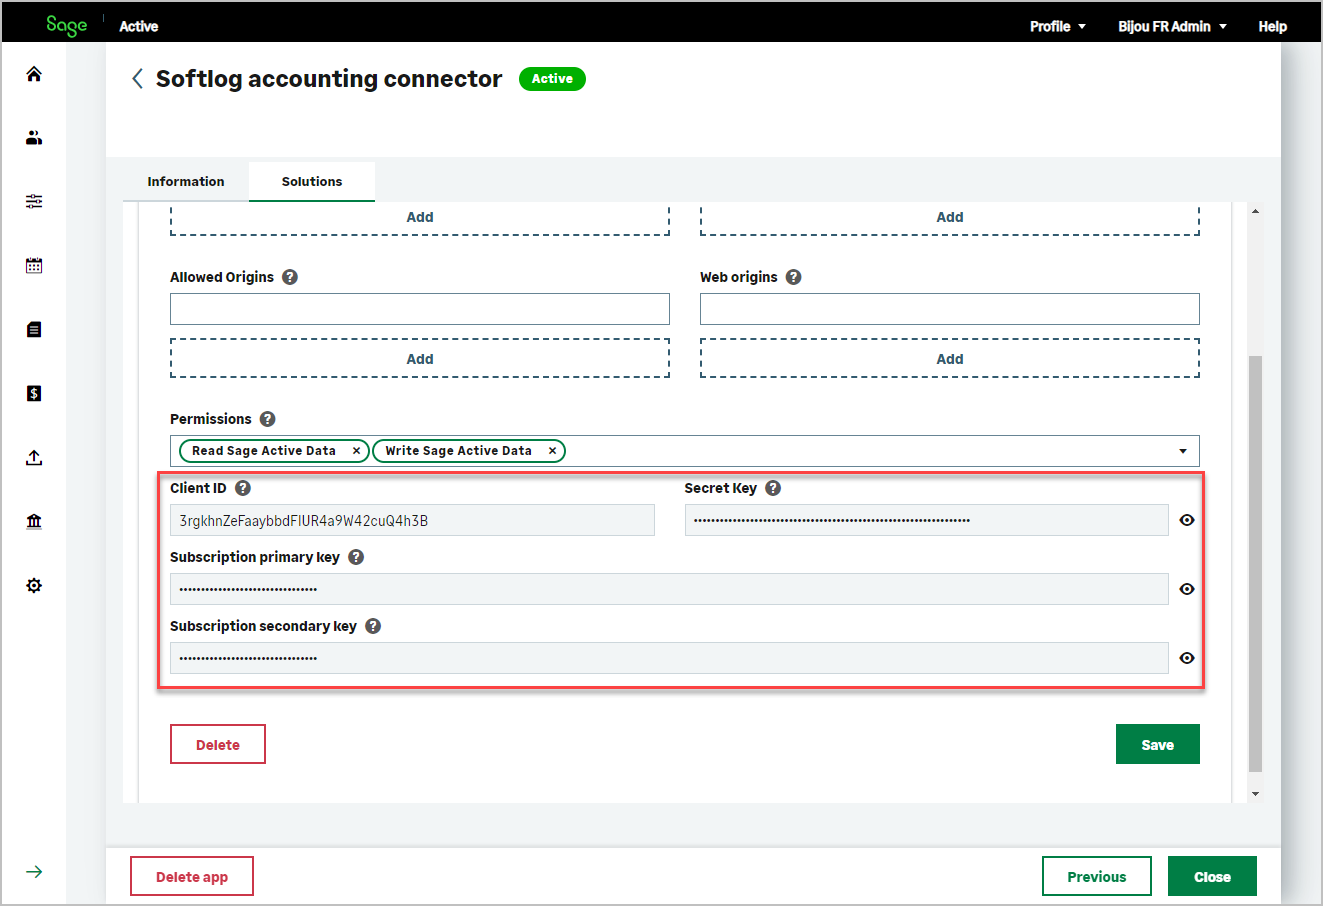
- If your application type is not Web Application, the Client Secret will not be visible because it cannot be used in this context.
- There is a primary key and a secondary key for the Subscription Key, for example this allows you to temporarily share a key, then revoke it later by generating a new key.
- Click on the Close button. The application you just created now appears in the list of applications.
You can change its settings at any time.

Congratulations! Your app is now created.
In the next step, before starting to test Sage Active Public API V2 with Postman, you will access to an organization in Sage Active and consult the list of Journals.
You will then be able to verify that you are accessing the same list of Journals during your first call to Sage Active Public API V2.