Schema Composition
Less than to read
This guide demonstrates how to create multiple schema JSON files that can reference each other to manage common UI elements and actions across different pages in Sage 200. By breaking down the schemas into common and unique parts, you can effectively manage the size and complexity of your files while promoting code reuse and separation of concerns.
Step 1: Creating Common UI Elements and Action
In this scenario, let’s consider a common set of UI elements and actions that will be shared across the New and Amend customer screens. We start by creating a JSON file called customer-base.json that contains the common elements. Here’s an overview of the file structure:
{
  "version": "1.0",
  "pages": [
    "sales/amend-customer",
    "sales/new-customer"
  ],
  "uiExtensions": [
    {
      "id": "commonTextbox",
      "component": {
        "Textbox": {
          "id": "spare_text_1",
          "label": "Reference",
          "mt": 2
        }
      }
    },
    {
      "id": "commonButton",
      "component": {
        "Button": {
          "id": "buttonOne",
          "mt": 3,
          "ml": 2,
          "onClick": {
            "action": "commonButtonClick"
          },
          "children": ["Disable"]
        }
      }
    }
  ],
  "actions": {
    "commonButtonClick": [
      {
        "set": {
          "properties": {
            "main_address/address_1": {
              "disabled": true
            }
          }
        }
      }
    ]
  },
  "validations": [],
  "events": []
}
In the customer-base.json file, we define two common UI elements: a Textbox and a Button. Additionally, we define a common action called commonButtonClick to handle the button’s click event. These elements can be used and referenced in other schema files.
Step 2: Creating the Schema for the Amend Customer Screen
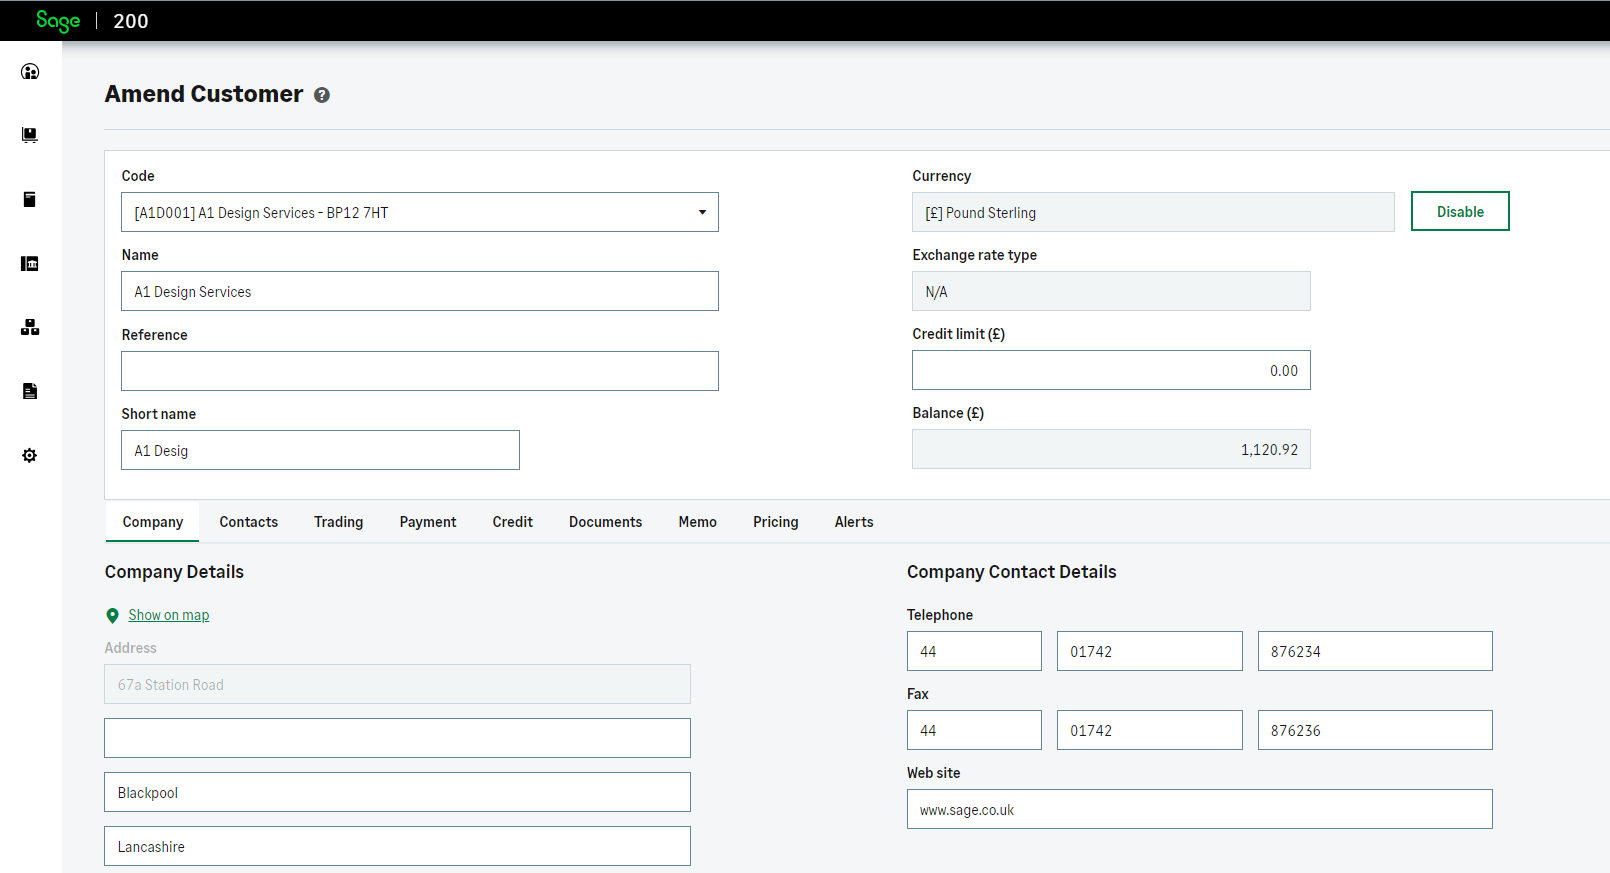
Next, we create a separate JSON file specifically for the Amend customer screen. This schema file can access and utilise the common elements defined in customer-base.json. Here’s an overview of the file structure:
{
  "version": "1.0",
  "pages": [
    "sales/amend-customer"
  ],
  "uiExtensions": [],
  "actions": {},
  "validations": [],
  "events": [
    {
      "onLoad": [
        {
          "set": {
            "pageExtension": {
              "componentId": "name",
              "panel": "bottom",
              "uiExtension": "commonTextbox"
            }
          }
        },
        {
          "set": {
            "pageExtension": {
              "componentId": "currency_id",
              "panel": "right",
              "uiExtension": "commonButton"
            }
          }
        }
      ]
    }
  ]
}
In this schema file, we focus on the sales/amend-customer page and Utilise the common Textbox and Button components defined in customer-base.json. We position these components on the page by specifying their component IDs and panels within the onLoad event.

Step 3: Creating the Schema for the New Customer Screen
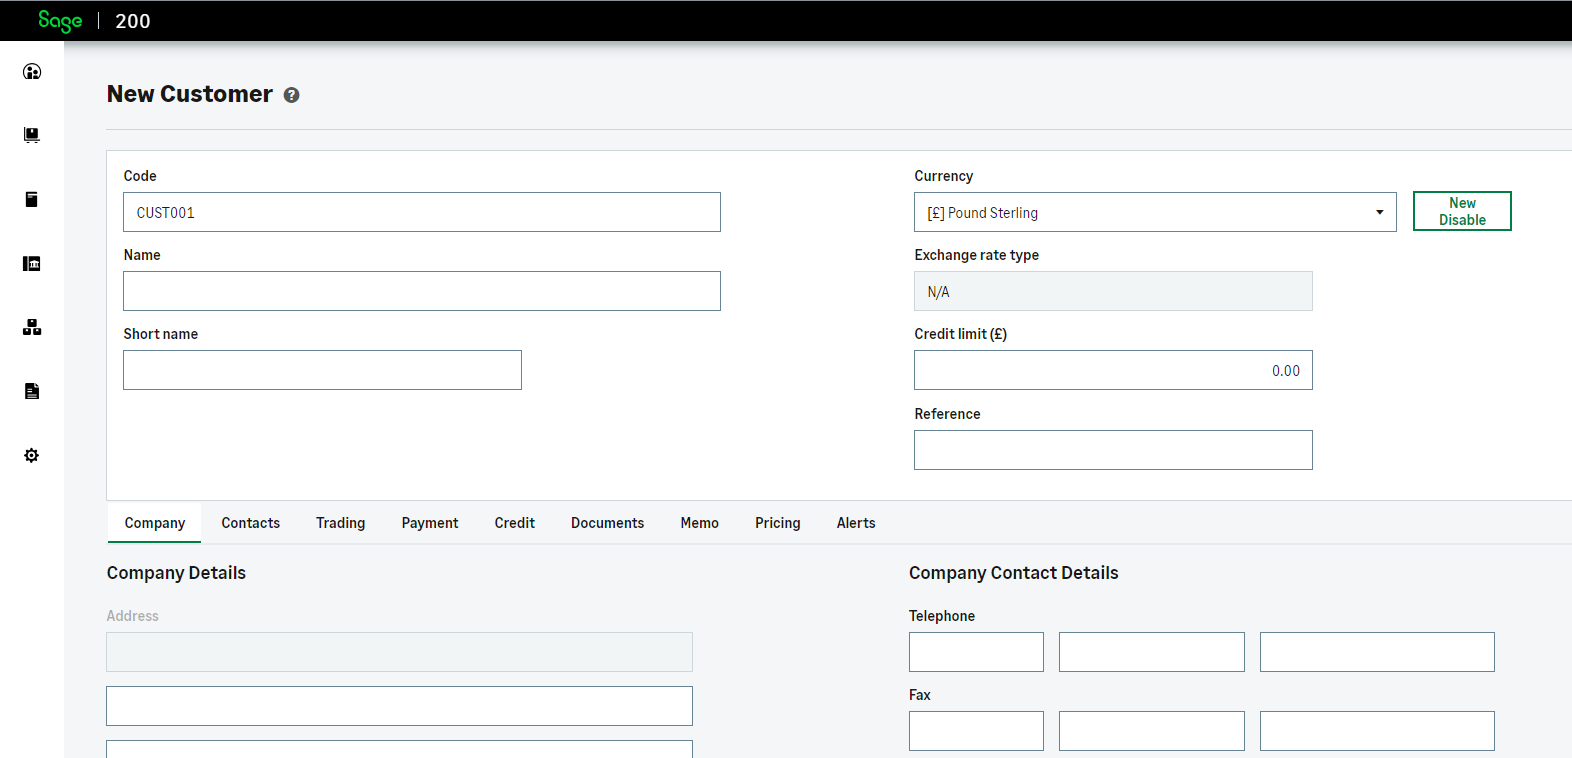
Lastly, we create another JSON file for the New customer screen, which also accesses the common elements defined in customer-base.json. Here’s an overview of the file structure:
{
  "version": "1.0",
  "pages": [
    "sales/new-customer"
  ],
  "uiExtensions": [
    {
      "id": "newOnlyButton",
      "component": {
        "Button": {
          "id": "newOnlyButtonId",
          "onClick": {
            "action": "commonButtonClick"
          },
          "mt": 3,
          "ml": 2,
          "children": ["New Disable"]
        }
      }
    }
  ],
  "actions": {},
  "validations": [],
  "events": [
    {
      "onLoad": [
        {
          "set": {
            "pageExtension": {
              "componentId": "credit_limit",
              "panel": "bottom",
              "uiExtension": "commonTextbox"
            }
          }
        },
        {
          "set": {
            "pageExtension": {
              "componentId": "currency_id",
              "panel": "right",
              "uiExtension": "newOnlyButton"
            }
          }
        }
      ]
    }
  ]
}
In this schema file, we focus on the sales/new-customer page. We utilise the common Textbox component from customer-base.json and position it on the page. Additionally, we define and position a unique Button component specifically for the New customer screen. However, this new button also uses the common action commonButtonClick defined in customer-base.json.

By breaking down the schema files into common and unique parts, you can share and reuse UI elements and actions across multiple pages while still having the flexibility to customize and define unique components as needed.